Some events require a closer look at who is attending before their registration is finalized. With event·hapily, you can set up a custom approval process using a few custom properties, HubSpot workflows, and a dedicated view on your Event record.
This approach allows you to:
-
Require manual approval for specific events using a simple checkbox
-
Automatically queue new registrations in a "Pending" status
-
Review and approve or deny attendees from a single view on the Event record
-
Trigger automated acceptance or rejection emails based on your decision
🎥 Video Walkthrough:
How to | Build Registration Approvals - Watch Video

Step 1: Create the Required Properties
To manage approvals, you will need to create two new custom properties in HubSpot.
-
Navigate to your HubSpot settings and go to the hapily Event object.
-
Create a new checkbox property called Require Approval (Options: Yes/No). This allows your team to flag which events need manual review.
-
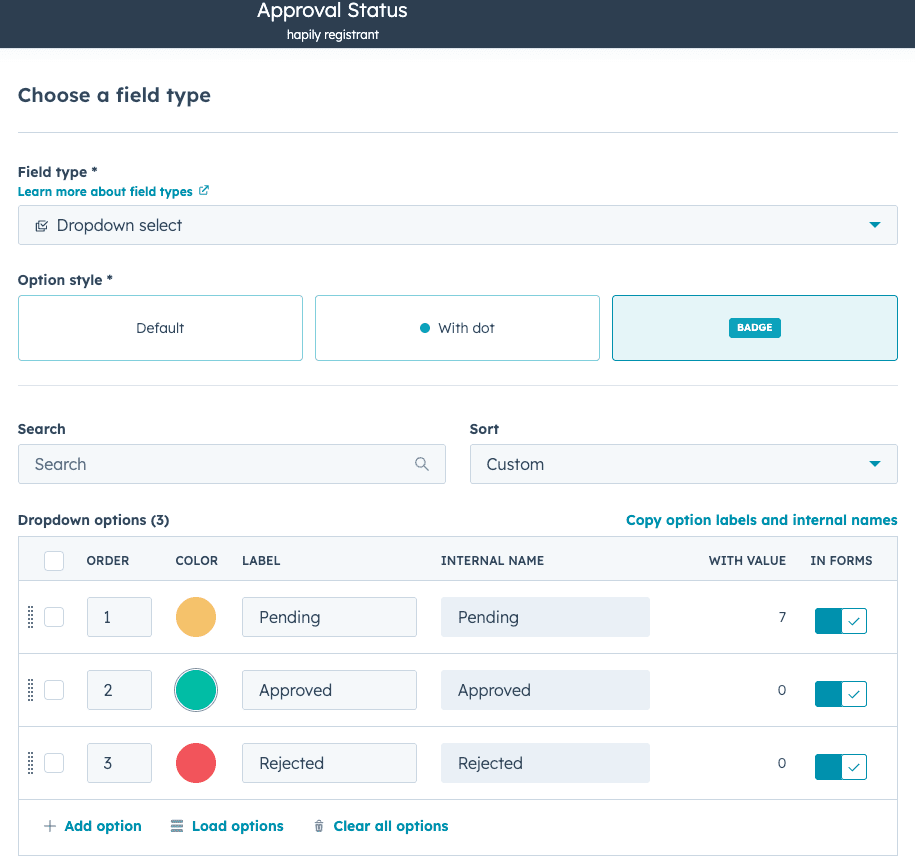
Next, navigate to the hapily Registrant object.
-
Create a new dropdown select property called Approval Status with three options: Pending, Approved, and Rejected.

Step 2: Update Your 'New Registrant Created' Workflow
You will need to adjust your existing registration workflow so that people signing up for an approval-required event are automatically marked as pending.
-
Open your existing newRegistrantCreated workflow in HubSpot.
-
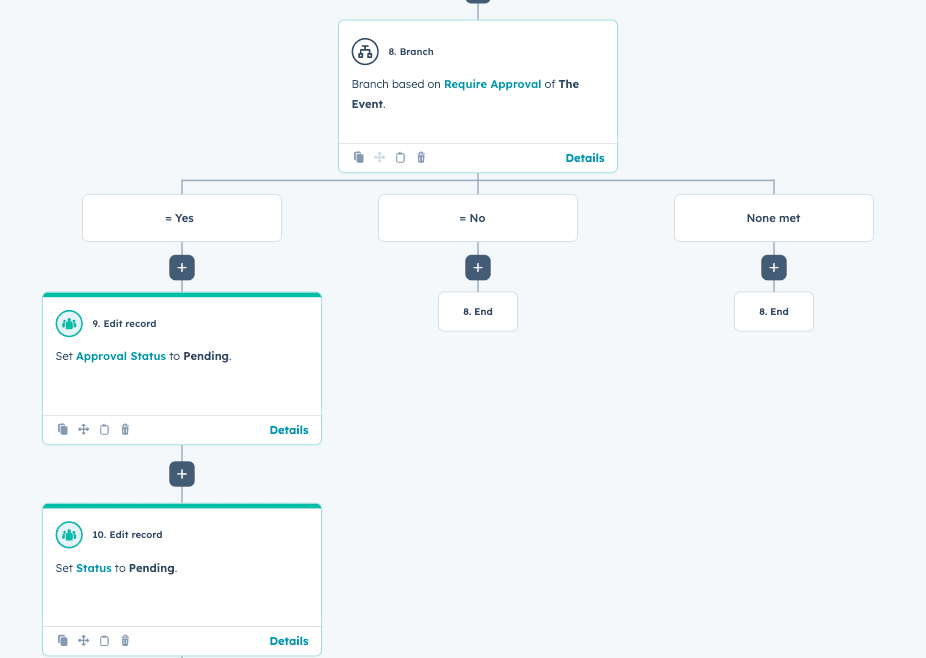
At the end of the workflow, add a Branch action based on the associated hapily Event.
-
Set the branch criteria to look for the Require Approval property you just created.
-
If the Event's
Require Approvalis equal to Yes, add an Edit record action for the enrolled Registrant. -
Update the Registrant's Status property to Pending.
-
Add another Edit record action to update the Registrant's Approval Status to Pending.
(Note: This ensures that confirmation emails triggered by a "Registered" status won't send until you approve them!)
Step 3: Create the 'Approval Status Update' Workflow
Now, you need a workflow that handles what happens when your team makes a decision.
-
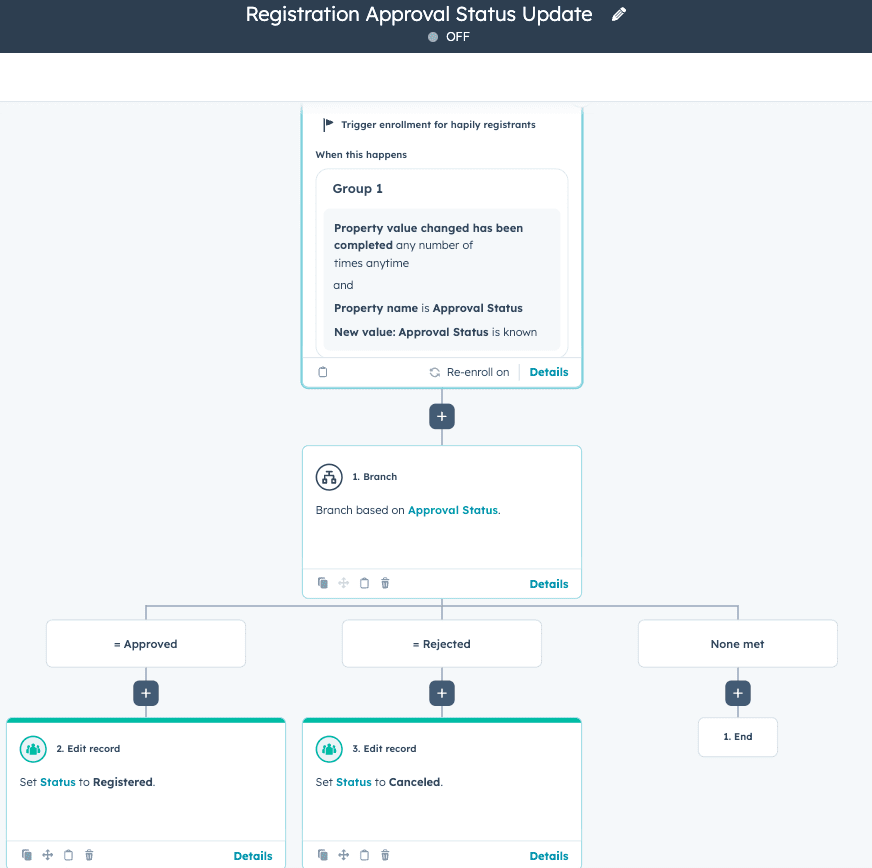
Create a brand new workflow from scratch based on the Registrant object (e.g., "Registration Approval Status Update").
-
Set the enrollment criteria: Approval Status has changed AND is any of Approved or Rejected.
-
Add a Branch based on the Approval Status property.
-
Under the Approved branch: Add an Edit record action to change the Registrant's Status to Registered. (You can also add a step here to send their official confirmation email).
-
Under the Rejected branch: Add an Edit record action to change the Registrant's Status to Cancelled (or a custom "Rejected" status if you prefer).
Step 4: Add an Approvals Table to Your Event Record
Finally, give your team an easy way to see and manage pending registrations without leaving the Event record.
-
Navigate to your hapily Event object settings and open the Record Customization (Record Layout) editor.
-
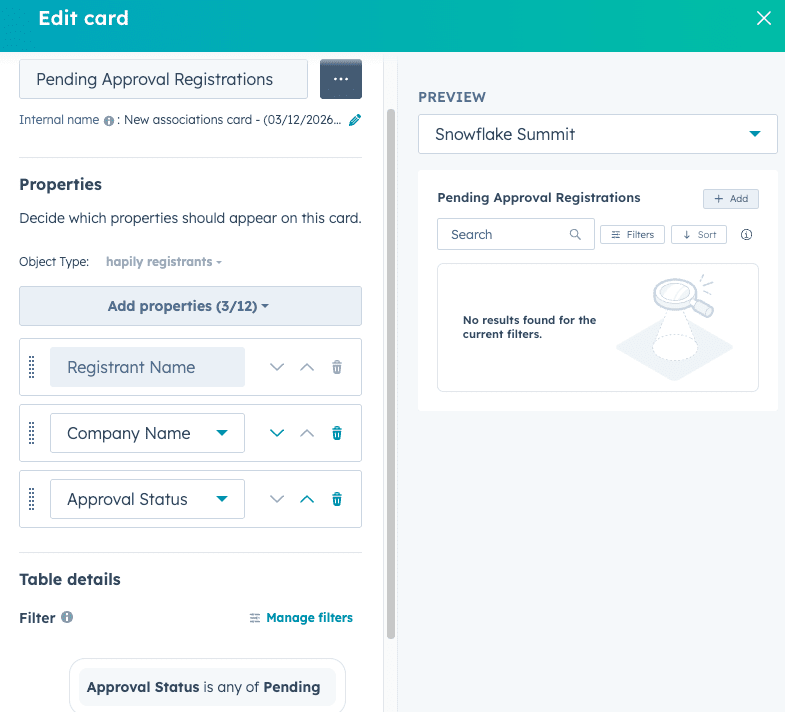
Add a new card and select Association table. Name it something like Pending Approval Registrations.
-
Select the hapily Registrant object.
-
Choose the columns you want your team to see, such as Registrant Name, Company Name, and Approval Status.
-
Apply a filter to the table so it only displays registrants where the Approval Status is exactly Pending.
Now, whenever someone registers for an event requiring approval, they will automatically appear in this list. Once your team updates their status to Approved or Rejected, they will drop off the list, and your workflow will handle the rest!
Summary
Using this custom approval setup, you can:
✅ Toggle approval requirements on an event-by-event basis ✅ Automatically place new registrants into a Pending queue ✅ Review registrant details (like Company Name) before approving ✅ Easily manage approvals directly from the Event record layout ✅ Automate post-decision status updates and email communications
Next Steps: