Overview
When checking attendees in for an event, your team may need immediate access to important registrant information — such as table assignments, badge page links, or any other event-specific details.
The Registrant Check-In Details feature lets you control exactly which registrant properties are displayed to admins at the moment of check-in, helping your team give clear instructions and take quick action on-site.
🎥 Video Walkthrough:
Watch the Registrant Check-In Details Tutorial →

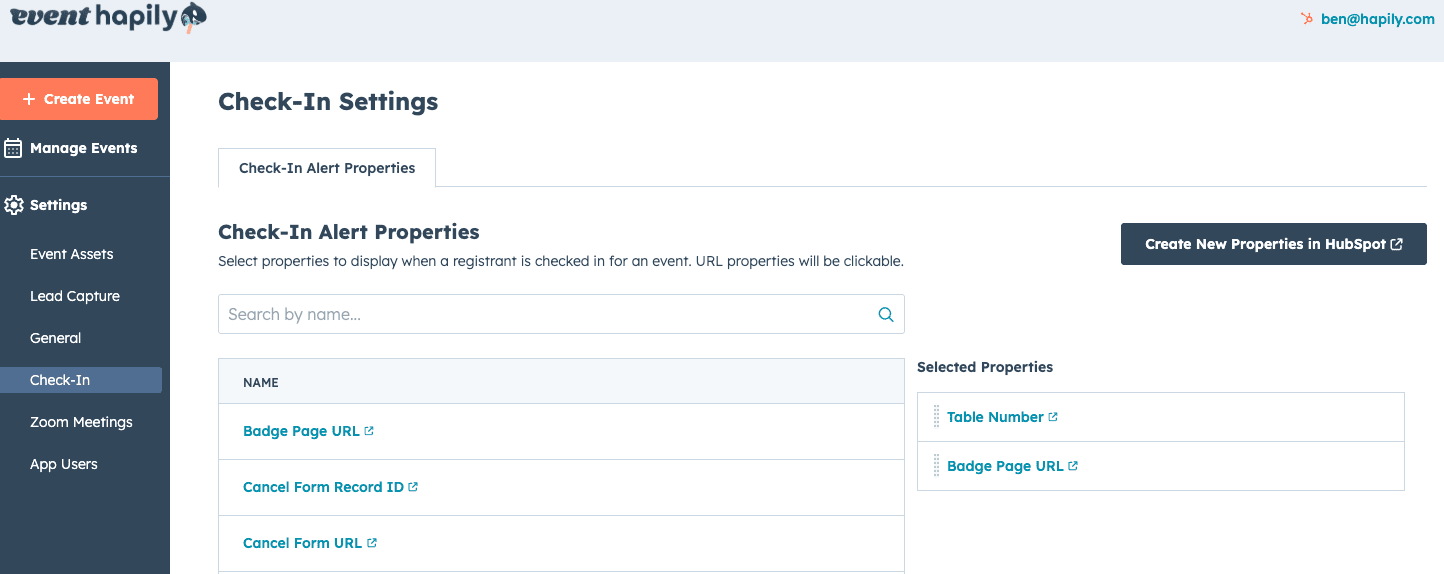
Step 1: Open the Check-In Configuration
-
From the event·hapily Admin Panel, navigate to the Check-In tab.
-
Locate the section labeled Check-In Alert Properties.
Step 2: Choose Which Registrant Properties to Show
Inside the Check-In Alert Properties panel:
-
Use the search bar to find any property on the hapily Registrant object.
-
Select the properties you want displayed during check-in (e.g., Table Number, Badge Page URL, Meal Preference).
-
Drag and drop to reorder the properties.
-
Click Remove to delete a property from the Check-In Details panel.
📝 Tip: Arrange high-priority information — such as QR code, table number, or badge link — at the top for faster on-site processing.
During Event Step 1: Check In an Attendee
After configuring your properties:
-
Navigate to the Check-In Page for your event.
-
Search for a registrant or scan their QR code.
-
When you check them in, the Registrant Check-In Details panel displays the properties you selected.
For example, when checking in Max Code:
-
Table Number: 3
-
Badge Page URL: Tap to open and print
-
Any additional custom properties you added
This helps your staff immediately:
-
Direct the attendee (“You’re at table 3”)
-
Print badges
-
Reference special instructions
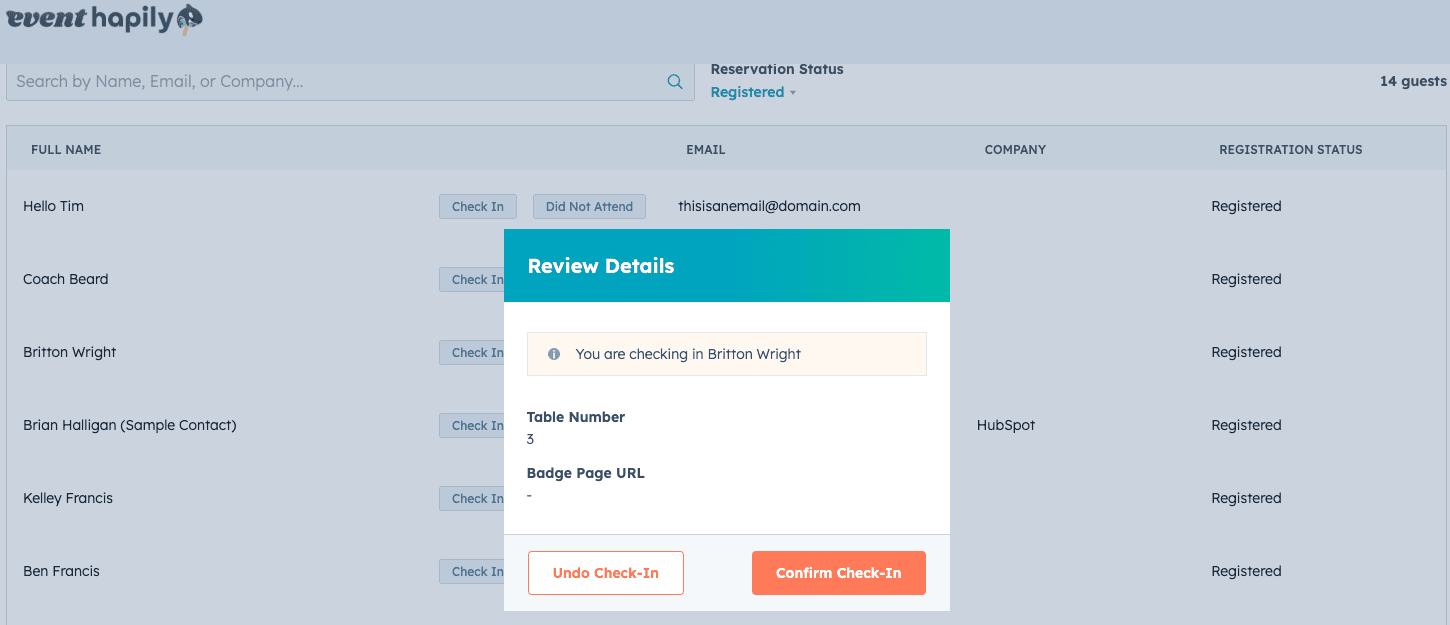
During Event Step 2: Confirm Check-In
Once the details have been reviewed or acted on:
-
Click Confirm Check-In.
-
The registrant is successfully checked in, and your team can relay instructions to the attendee and move to the next person.
Next Steps: