With hapily Registration Flows, you can seamlessly capture guest registrations under a single primary registrant. This allows you to:
-
Speed up the checkout process for guest registrants.
-
Avoid requiring email addresses and personal information for every single guest. Previously not possible with HubSpot forms
-
Automatically link all guest registrations back to the primary contact in HubSpot.
-
Generate individual QR codes and check in guests seamlessly at the door.
🎥 Video Walkthrough:
hapily | Guest Registration Overview - Watch Video

Step 1: Create a New Event in the Event Builder
-
Navigate to the Event Builder inside hapily and create a new event record.
-
Enter your event details, including Title (e.g., Guest Registration Event), Date and Time, and Location.
-
Under the registration method, select the hapily registration flow instead of a HubSpot form.
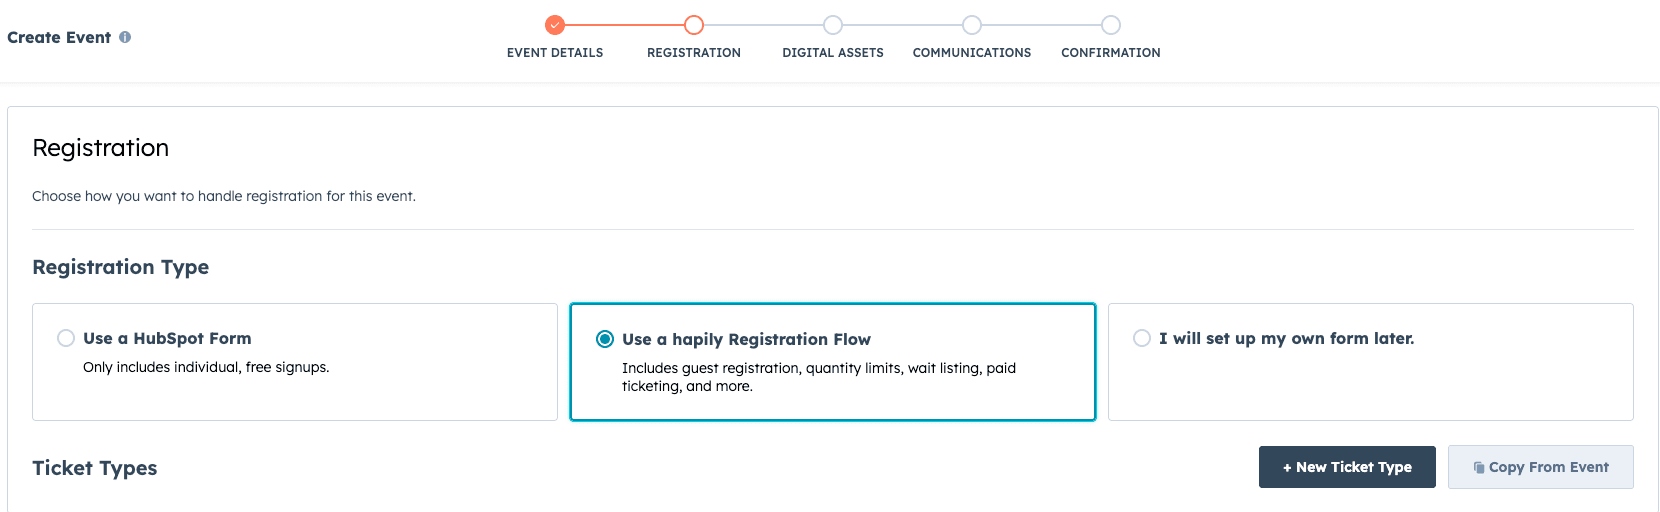
Step 2: Configure the Guest Registration Ticket Type
-
Create a new ticket or registration type for the event.
-
Provide a name for the ticket (e.g., Guest Registration) and configure any pricing or quantity limits if applicable. Click Continue.
-
On the next screen, toggle on Guest Registration. This ensures that no additional ticket holder information will be required to reserve this registration type.
-
Set the Default Registration Status to Registered.
-
Configure your availability and transfer rules, then click Next to finalize and create the ticket type.

Step 3: Set Up Primary Registrant Information & Event Assets
-
Define the fields required for the primary contact who is completing the registration. At a minimum, require First Name, Last Name, and Email Address. This allows hapily to link all guest tickets back to this primary contact.
-
Add any additional property values from HubSpot Contact or Registrant objects if needed.
-
Add your Event Info and upload a Featured Image, then click Next.
-
Choose the HubSpot assets you want hapily to generate automatically (e.g., lists, emails, landing pages) or bypass this section if you prefer to set them up later.
-
Click save to generate the event record inside hapily.
Step 4: Activate the Registration Flow
-
Find your newly created event in the hapily dashboard.
-
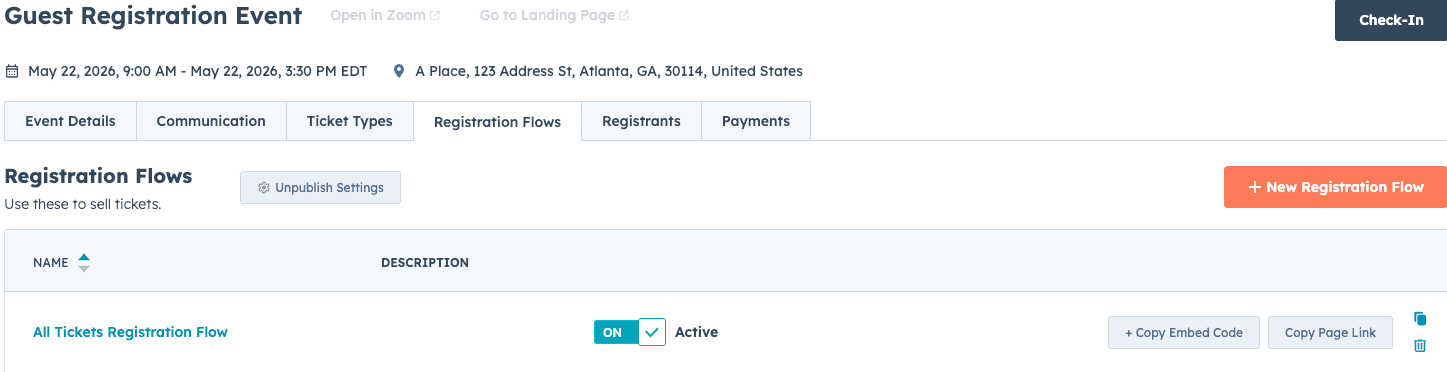
Navigate to the Registration Flow tab on the event record.
-
Locate the default registration flow (typically named All Tickets) and toggle it on to make the registration page live.
Testing Guest Registration
Step 5: Process and Manage Guest Registrations
-
Open the public registration page for your event or embed the registration flow HTML on your own page.
-
Fill out the primary contact information and click Process Registration.
-
Select the desired number of registrations (e.g., 3) and click Book Tickets, then Confirm Booking.
-
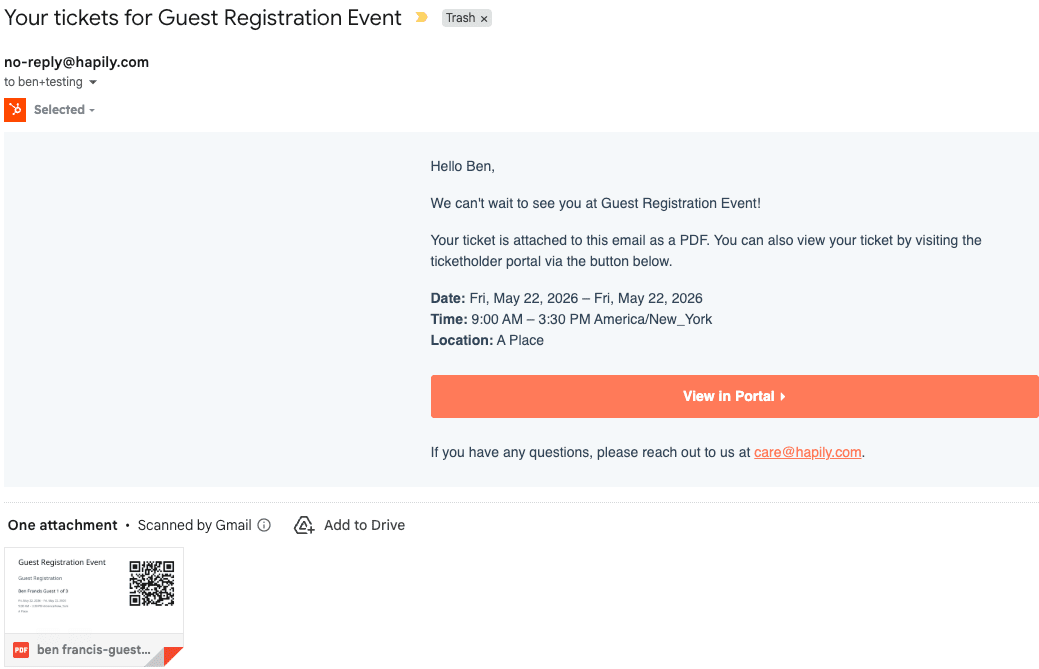
Once completed, the primary contact will receive an email confirmation containing individual QR codes for themselves and each guest (labeled as Guest 1, Guest 2, etc.).
-
In the Ticket Holder Portal, the primary contact can optionally assign those tickets to specific names later if they choose.

Step 6: Track and Check In Guests
-
Inside the hapily Registrants tab for your event, you will see individual line items created for Guest 1, Guest 2, and Guest 3.
-
Inside HubSpot, these guest records will automatically associate back to the primary contact record who processed the registration.
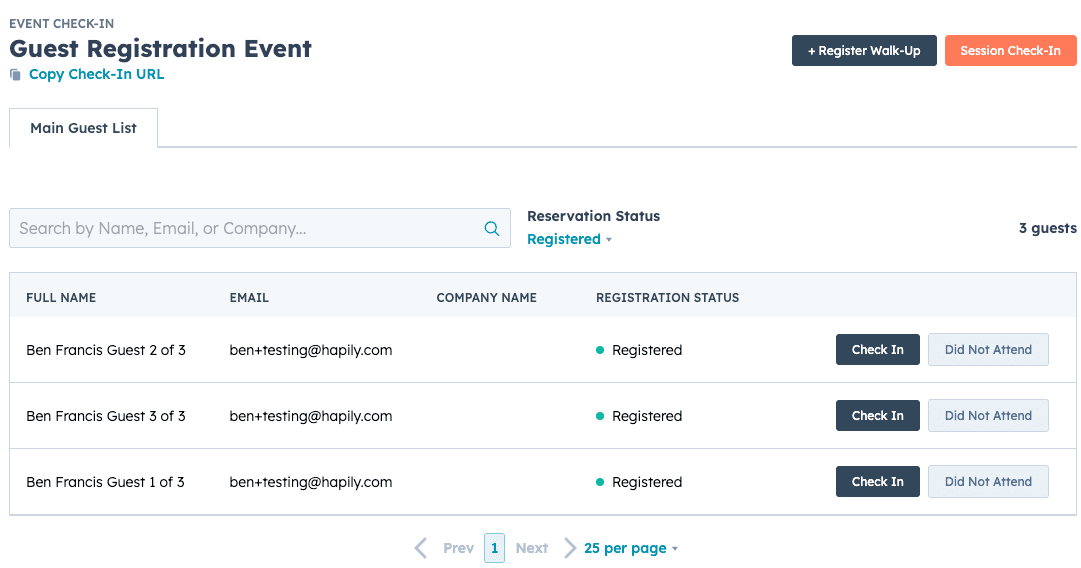
-
When it is time for the event, launch the hapily Check-in portal. You can check in the primary contact and each of their guests individually, or mark them all as attended.
Summary
✅ Enabled guest registrations without forcing users to input separate contact details for every guest.
✅ Simplified the registration experience to reduce checkout friction.
✅ Automatically associated all unnamed guest tickets directly to the primary buyer contact in HubSpot.
✅ Maintained independent QR codes and ticket records for seamless check-in management.