When exhibiting at trade shows or large industry events, organizers often provide a post-event spreadsheet containing the full list of registered attendees. While these individuals might not have interacted directly with your booth staff via the hapily lead capture app, tracking who was in the room is vital for complete event ROI analysis.
This approach allows you to:
- Import an external roster of event attendees without disrupting your active lead capture data.
- Establish a clear, labeled relationship between HubSpot contacts and hapily event records.
- Cross-reference your team's direct booth engagements against the overall event attendance list.
🎥 Video Walkthrough:
Import Known Attendees to Events in HubSpot - Watch Video

Step 1: Complete the Prerequisite Association and Event Setup
Before importing your list, you must ensure that your HubSpot data model recognizes the relationship between your contacts and your event records.
- Verify that your specific event record already exists within hapily.
- Navigate to your HubSpot Settings (gear icon) > Objects > Associations.
- Create a custom association label between the Contact object and the hapily event object.
- Name the label Known Attendee (or an equivalent term that aligns with your internal reporting framework).

Step 2: Prepare Your Import Spreadsheet
Next, format your external attendee spreadsheet so HubSpot can cleanly map the data and automatically create the necessary object associations.
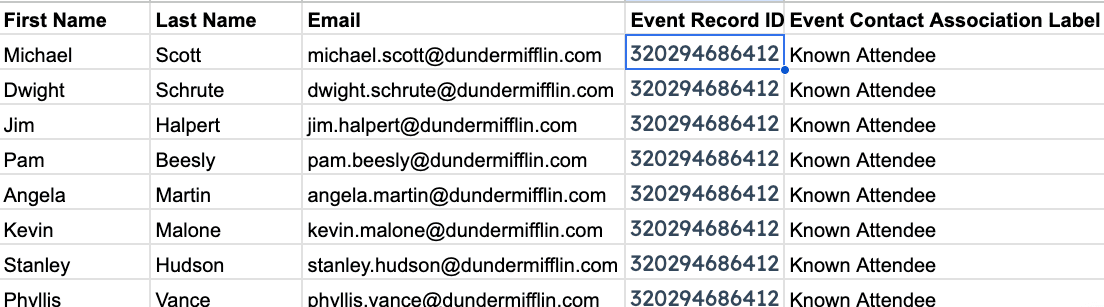
- Set up standard contact columns for First Name, Last Name, and Email.
- Go to your event record in HubSpot and copy the unique Record ID of the hapily event.
- Add a new column to your spreadsheet named Event Record ID and paste the copied ID down the entire column for every attendee row.
- Add another column named Association Label and enter Known Attendee (matching your HubSpot association label exactly) for every row.
- Save or download your spreadsheet as a .CSV file.
Step 3: Configure the HubSpot Import Tool
With your file prepped, use HubSpot's advanced import workflow to bring in the data.
- In HubSpot, navigate to Contacts > Imports and click Start an import.
- Select File from computer, then click Next.
- Choose One file and click Next.
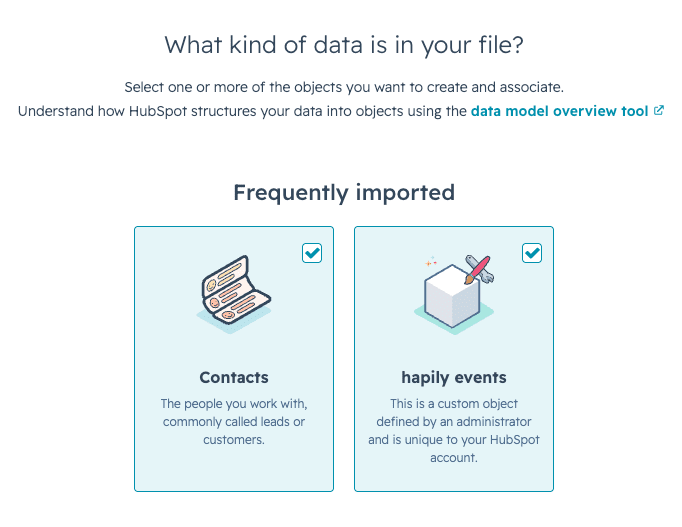
- Select Multiple objects and check the boxes for both Contacts and hapily events, then click Next.
- Set your import rules to Create and update contacts and Update existing hapily events. Note: This prevents duplicate contact creation and ensures you don't accidentally overwrite primary event data.
- Upload your prepared CSV file and proceed to the mapping screen.
Step 4: Map Columns and Finalize
Ensure HubSpot accurately reads your contact details, event records, and association labels before completing the process.
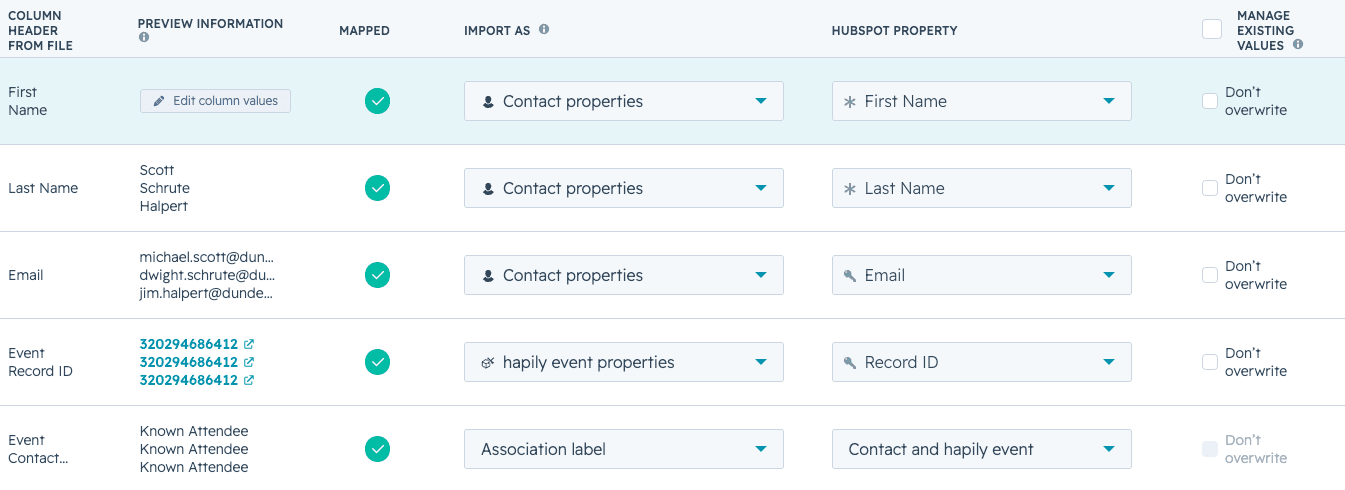
- Map First Name, Last Name, and Email to their respective HubSpot contact properties.
- Map your Event Record ID column to the hapily event object's Record ID property.
- Locate your Association Label column. Under the "Choose how to import" dropdown, select Association label.
- Confirm that the system maps it as the label linking a Contact and a hapily event, selecting Known Attendee.
- Click Next, review your settings, and click Finish import.
Once the import completes, navigating back to your hapily event record will display your newly imported contacts seamlessly tagged as Known Attendees.