
Setting up your email sending domain in hapily allows you to personalize the communications sent to your attendees. By connecting your domain, you ensure that system-generated emails look professional, match your brand, and achieve better deliverability.
This approach allows you to:
- Send automated calendar invites directly from your own branded domain.
- Deliver registration confirmation emails, receipts, and system messages using your custom email address.
- Improve overall email authentication and trust scores with your registrants' email providers.
🎥 Video Walkthrough:
How to set up Email Sending Domains in hapily - Watch Video
Before you start: Loop in your IT team
Before starting this process, identify the right internal resource to assist you.
This configuration requires making technical updates to your domain's core settings. The ideal Point of Contact is a member of your IT team, a network administrator, or the webmaster who holds direct administrative access to your company's DNS provider (e.g., GoDaddy, Cloudflare, or Route 53). If you do not have these permissions yourself, hapily provides options to export or email these records directly to your technical team during the setup wizard.
Step 1: Navigate to the Sending Domain Settings
- Log into your hapily account.
- Click on the Settings gear icon in the top right-hand corner of the screen.
- Select Sending Domain from the menu options to open the domain configuration interface.
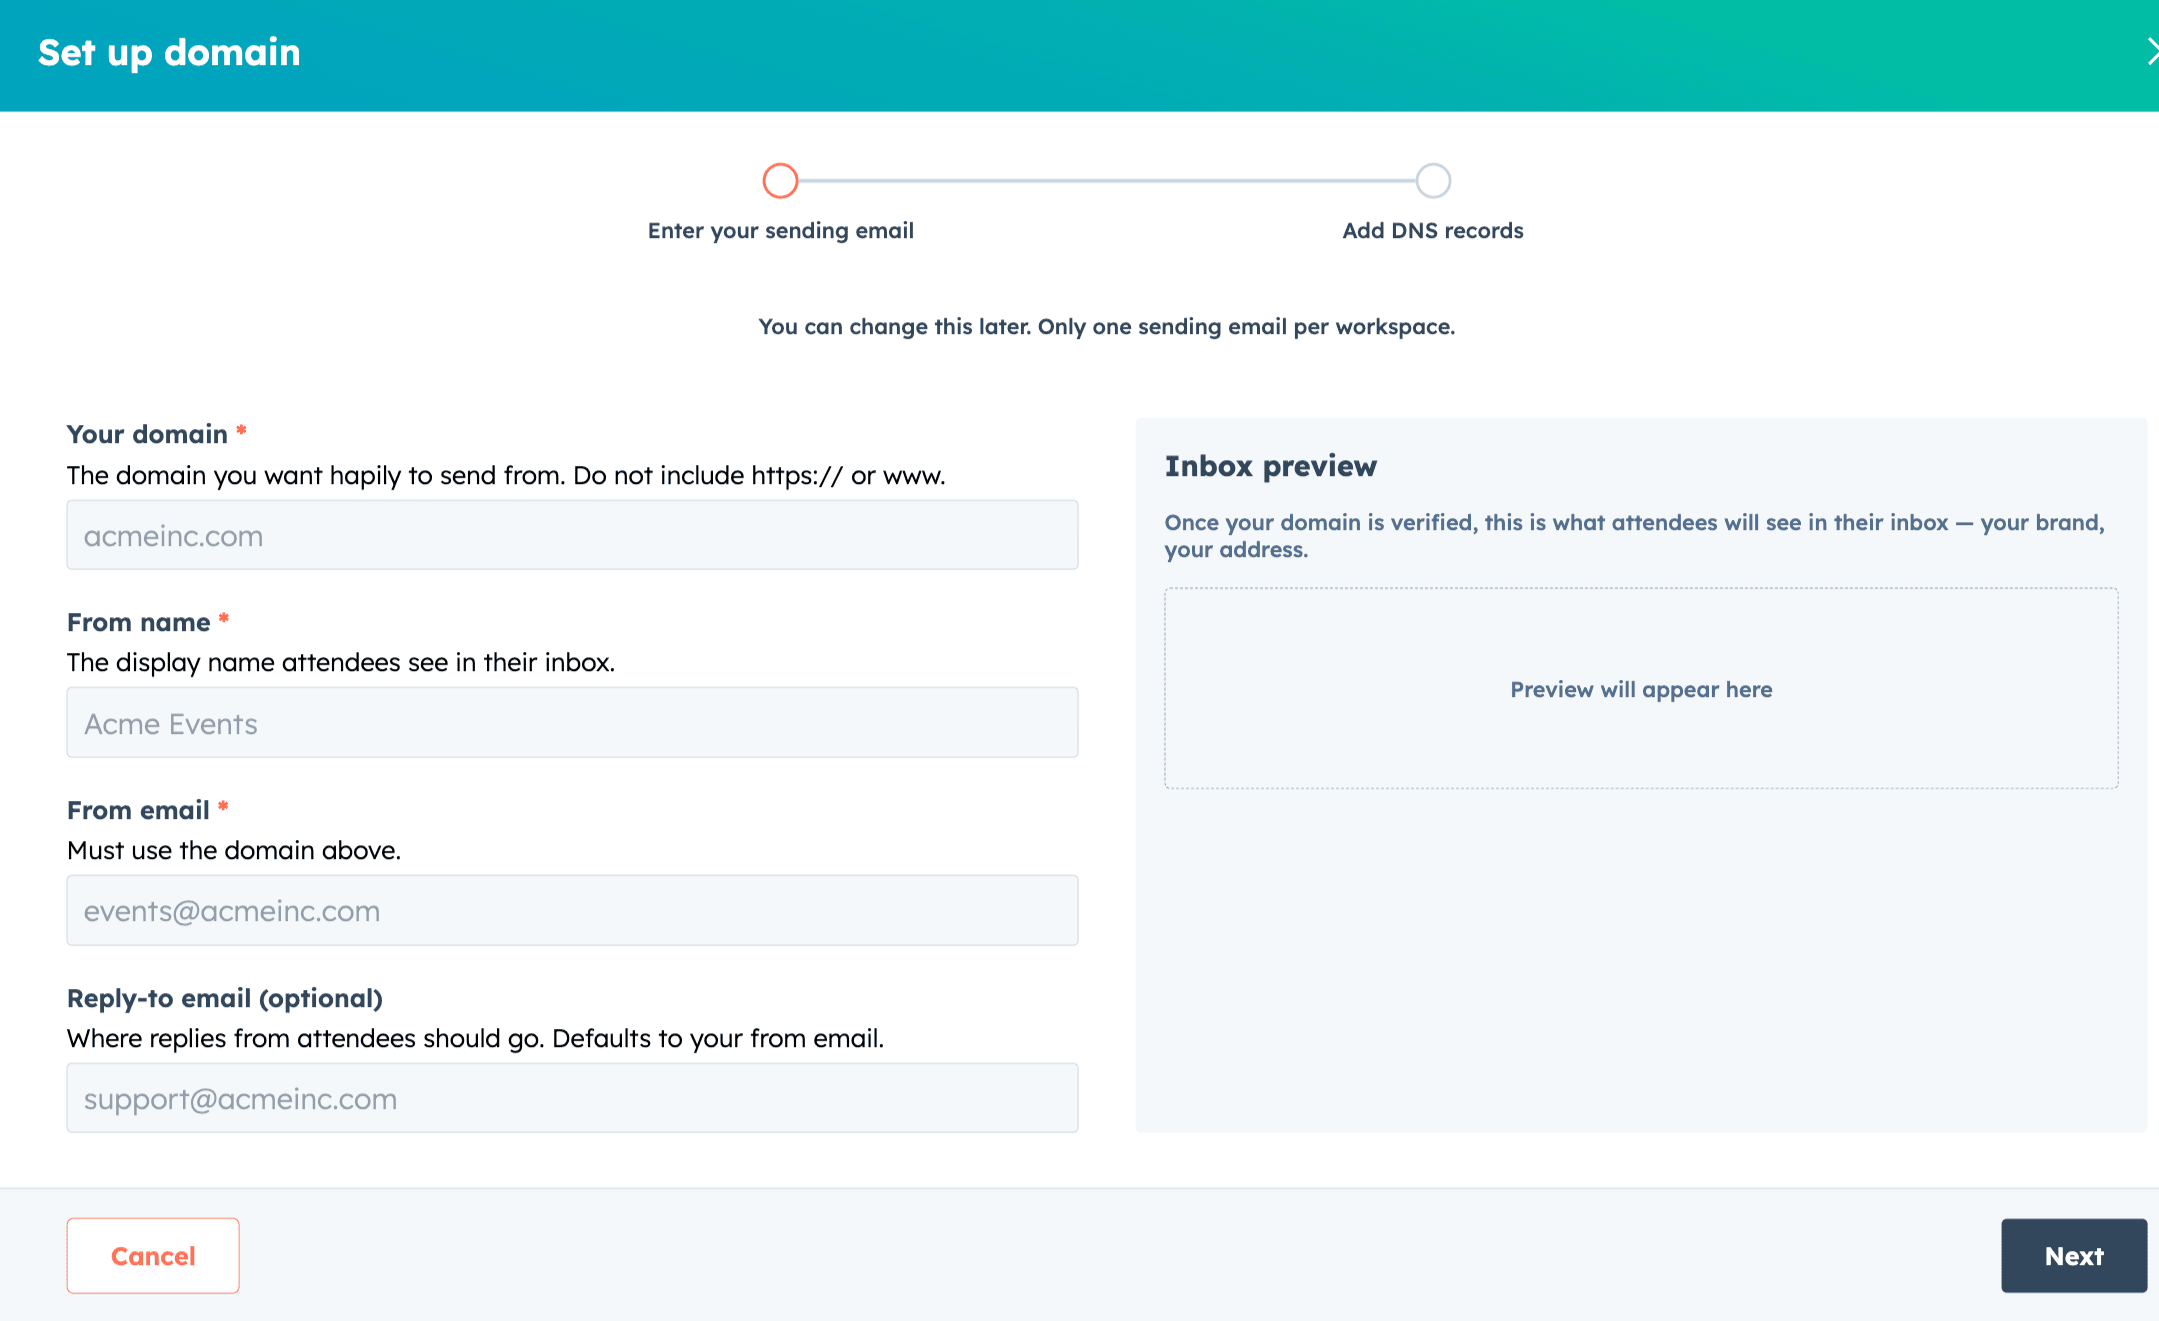
Step 2: Enter Your Domain Details
- Click the Set up domain button to start the configuration wizard.
- Enter your root Domain name (e.g.,
yourdomain.com).💡 Note: Do not include
https://orwwwin this field. - Enter your desired From Name. This is the display name attendees will see in their inbox (e.g.,
MJC Events). - Enter your From email address (e.g.,
max@yourdomain.com). - Enter a Reply-to email address. You can use the exact same address as your From email, or a separate inbox if preferred.
- Click Next.
Step 3: Implement the Generated DNS Records
- hapily will automatically generate a set of unique DNS records, including CNAME, MX, and TXT records required for authentication protocols like SPF and DMARC.
- Choose how you want to manage these records:
- Self-Service: Copy the individual Host Name and Value strings directly from the screen.
- Delegate to IT: Click Download instructions or use the built-in email tool to send the exact configuration instructions directly to your network administration or IT team.
- Log into your domain registrar or DNS hosting provider (such as GoDaddy, Cloudflare, or Route 53).
- Navigate to your domain's DNS Settings control panel.
- Click Add New Record for each record provided by hapily. Select the appropriate Type (e.g., CNAME), paste the Host Name into the Name field, and paste the corresponding text into the Value field.
- Save your changes within your DNS provider.
Step 4: Finish and Verify Your Records
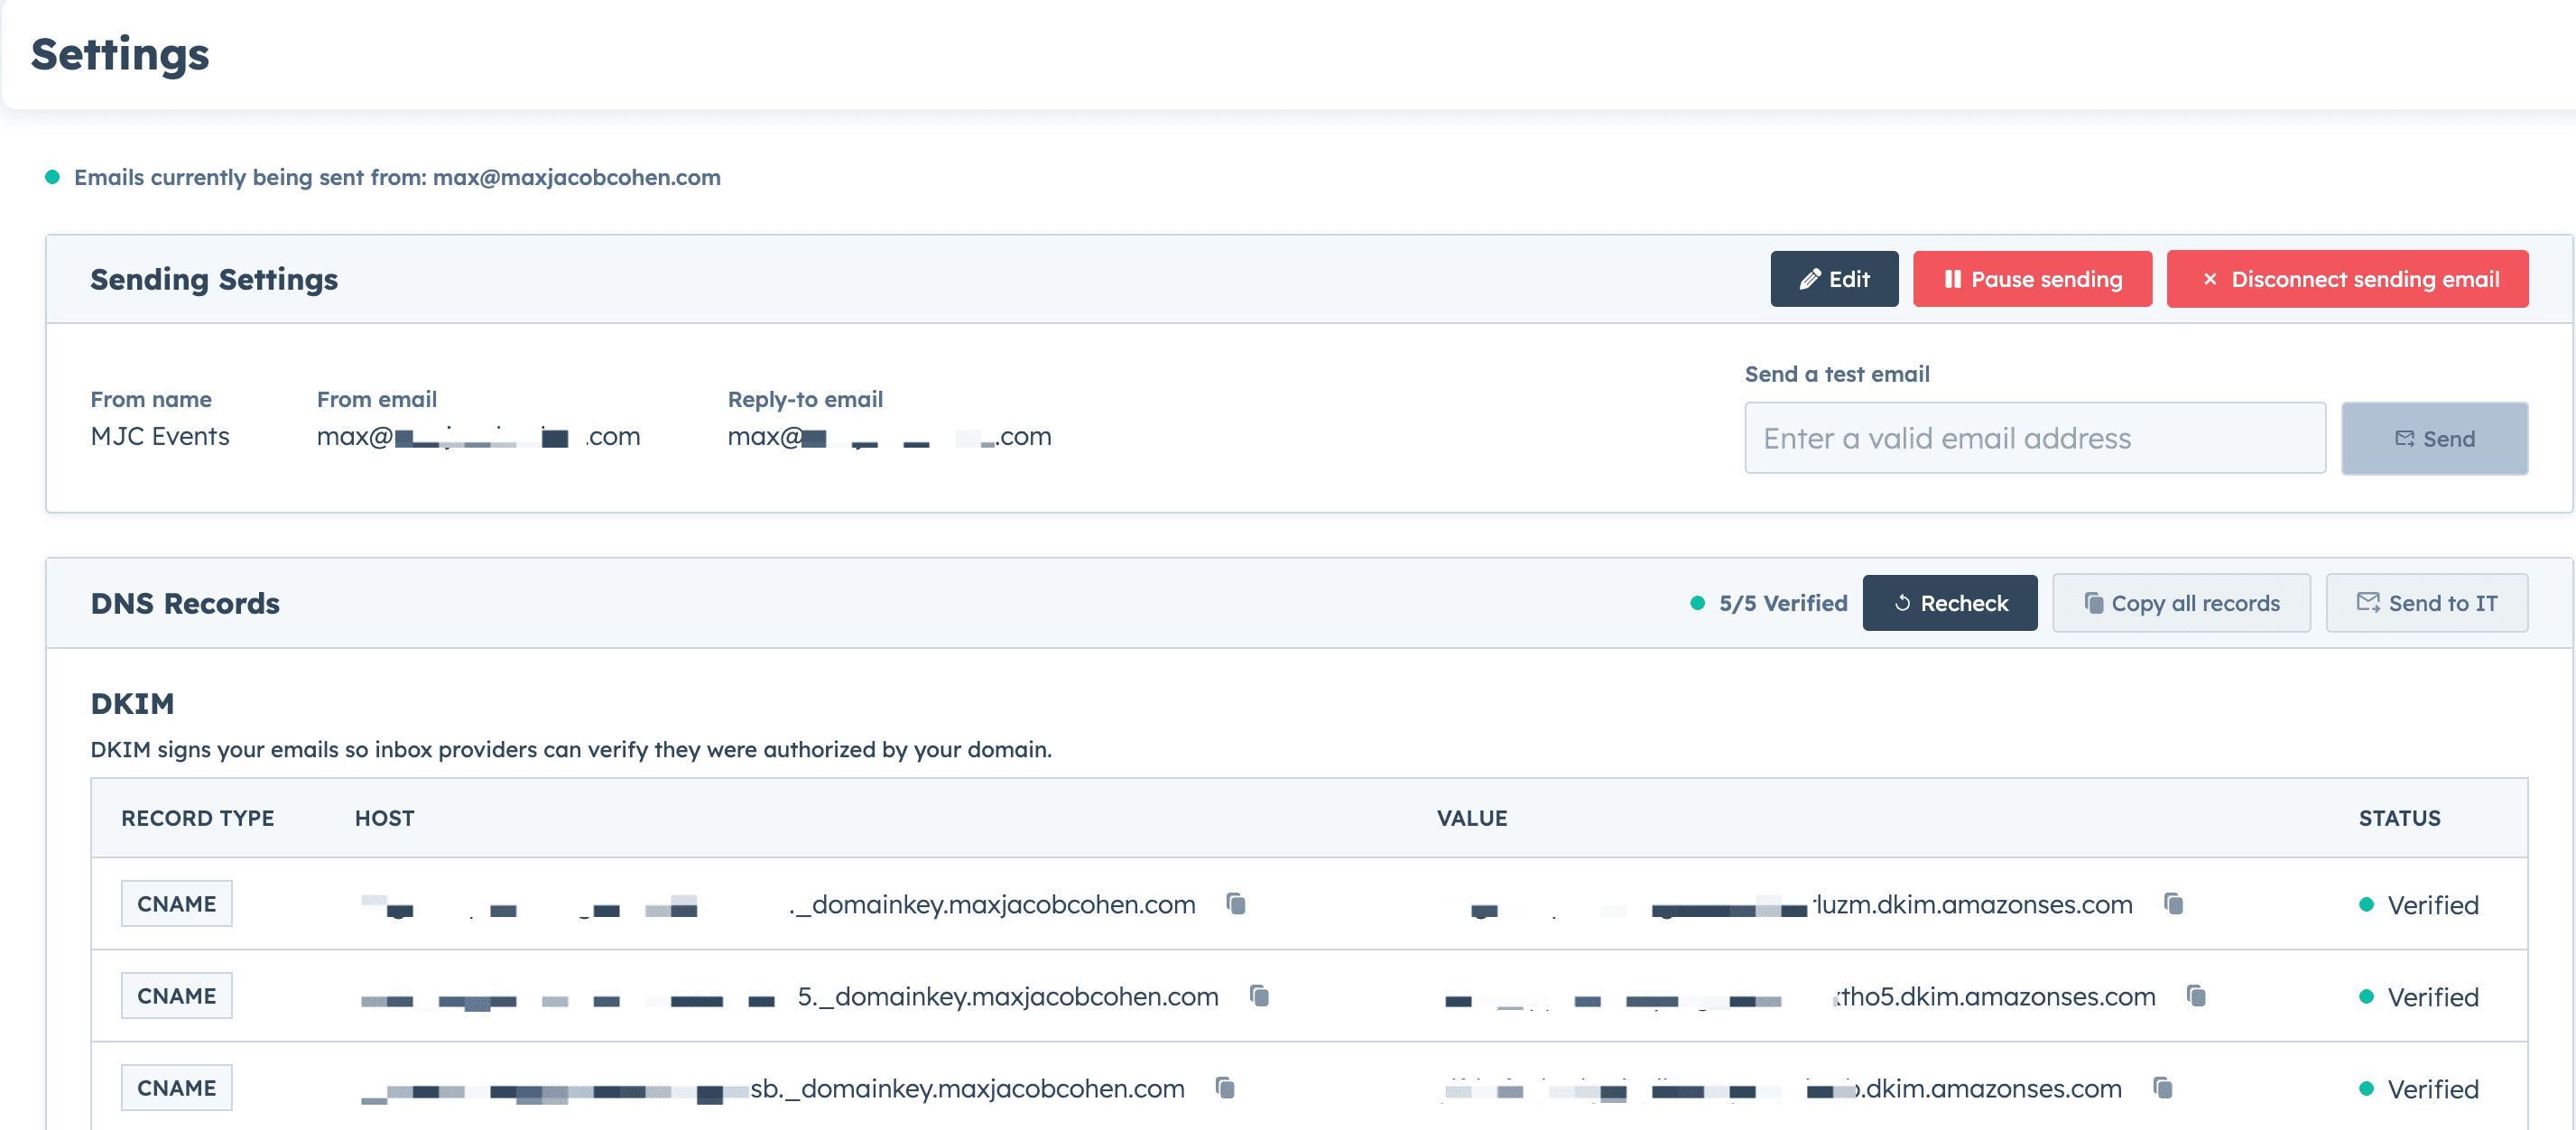
- Return to the hapily setup screen and click Finish and verify.
- The system will scan your domain's DNS configuration to confirm that all records are resolving correctly.
💡 Note: DNS updates can take up to 10 minutes to propagate across the internet. If the system does not verify them immediately, wait a few moments and click Recheck.
Step 5: Send a Validation Test Email
- Once all records display a verified status, locate the test email field on the confirmation page.
- Enter your own email address and click Send test email.
- Open your inbox to confirm that the test message arrived successfully, displays your personalized From Name, and reflects your custom domain.