You may find that the default columns on your customer's tickets aren't to your liking. Luckily, the Customer Service Portal allows you to customize them!
By default your customers will see the Subject, Ticket ID, Owner, Created On, and Status of their tickets. Here's what that looks like from the customer side: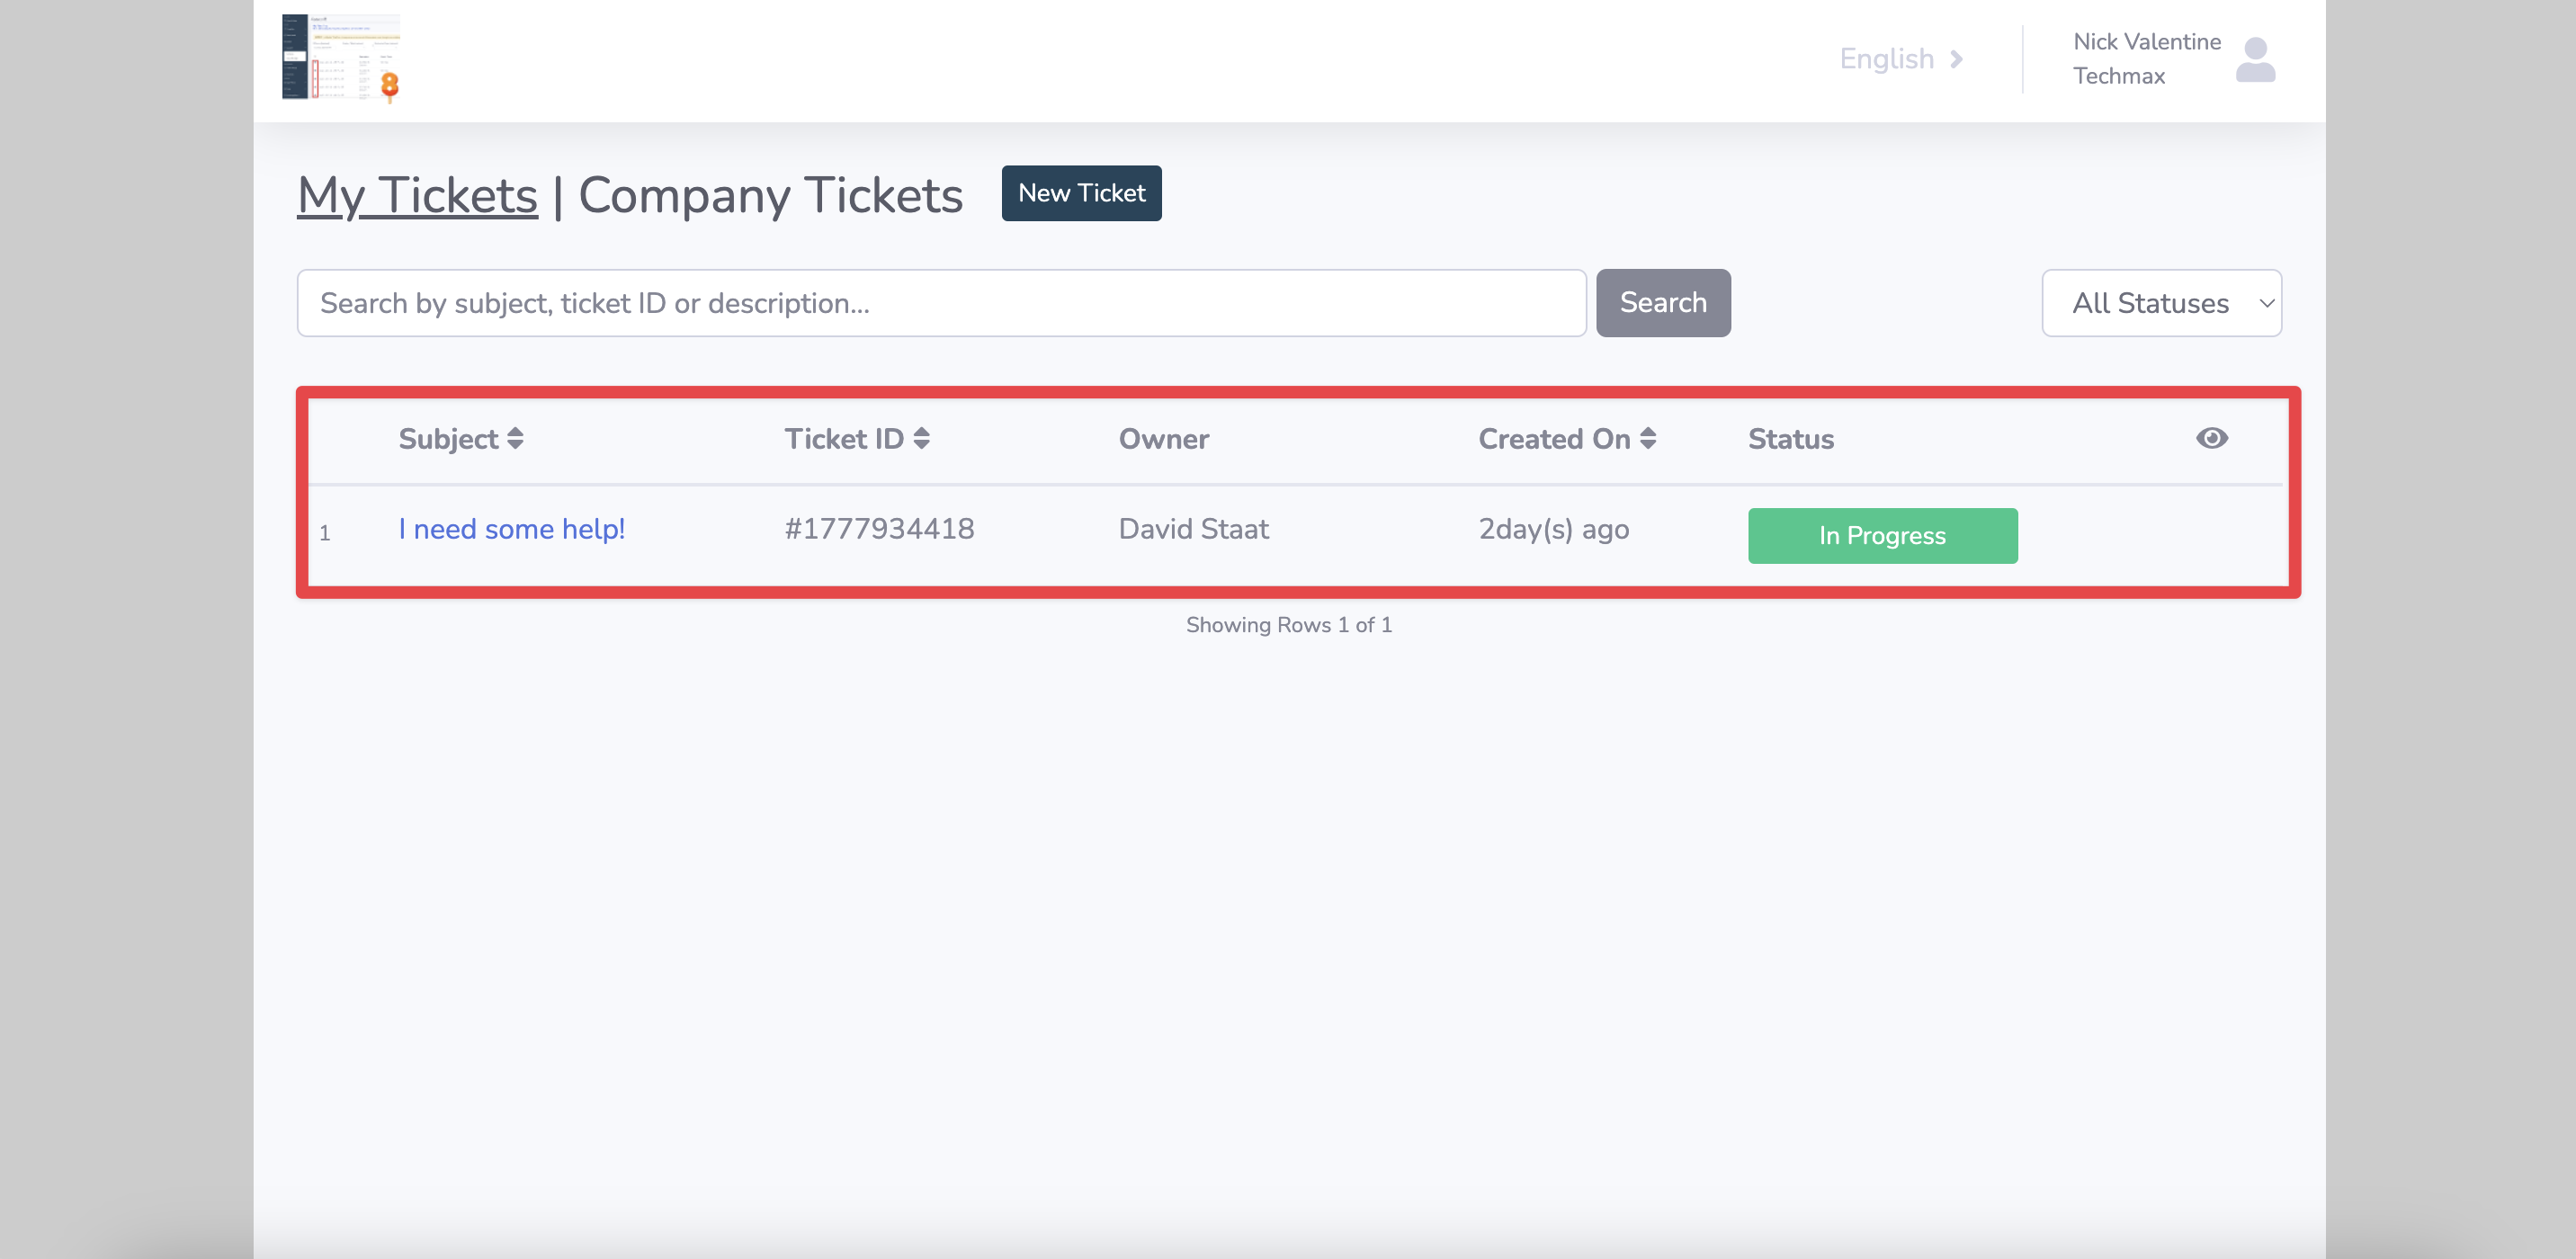
If you want to customize them, you can do so from within your hapily admin portal!
1. Start by logging into your hapily admin portal here.
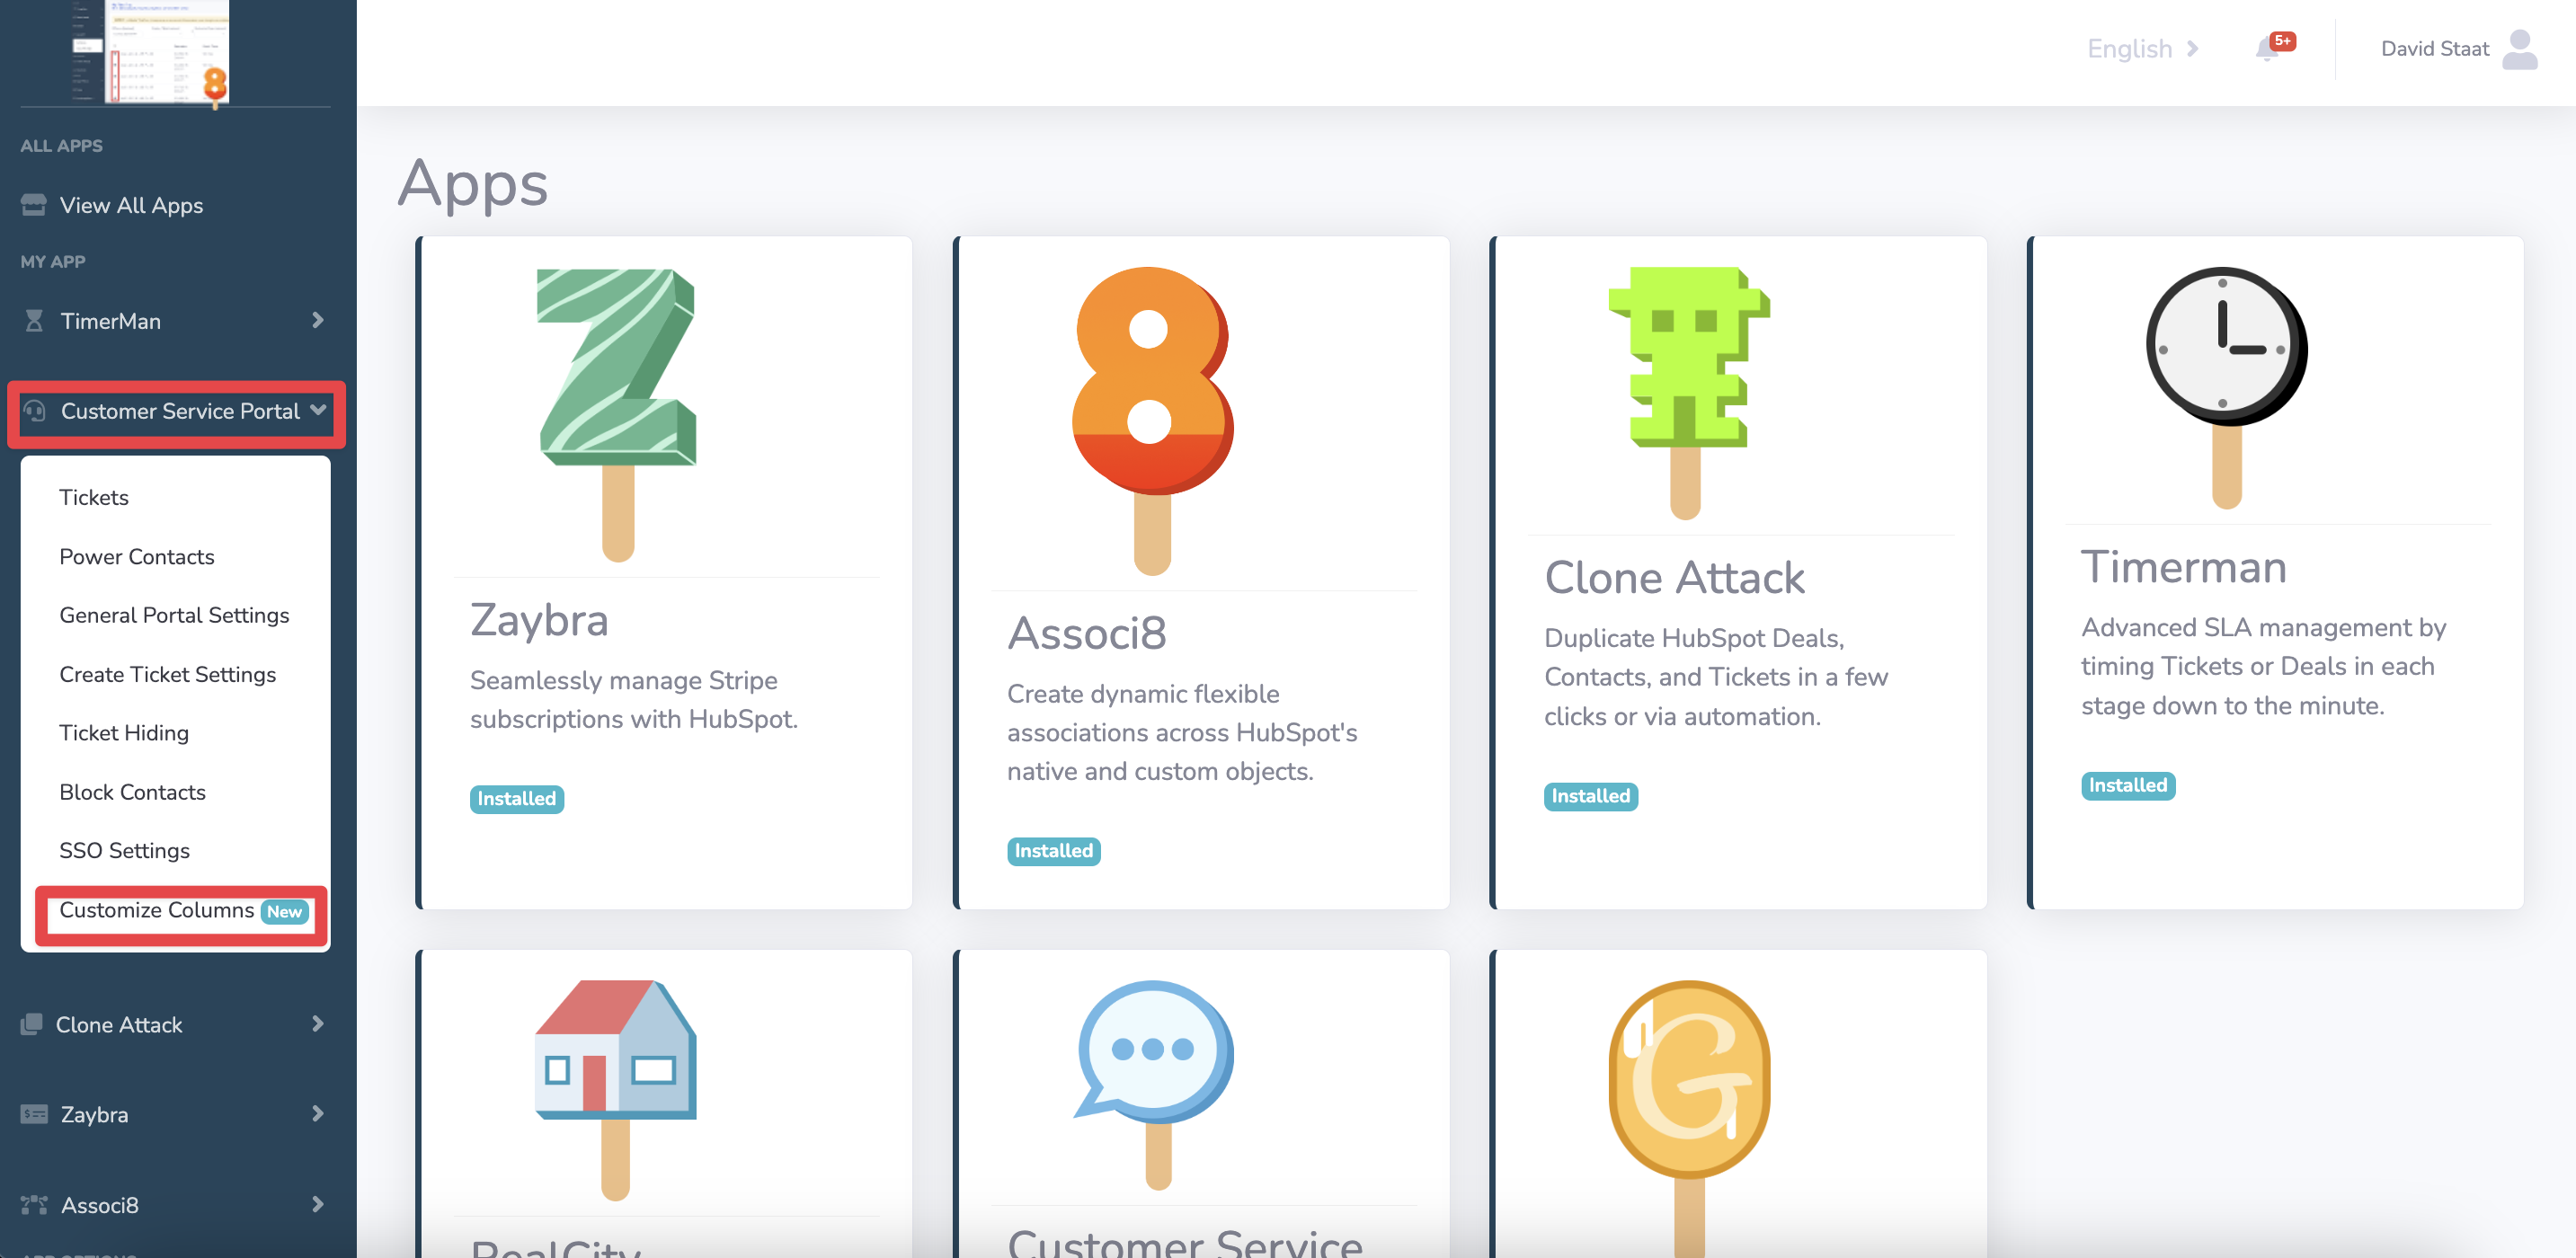
2. In the left sidebar, click Customer Service Portal > Customize Columns.
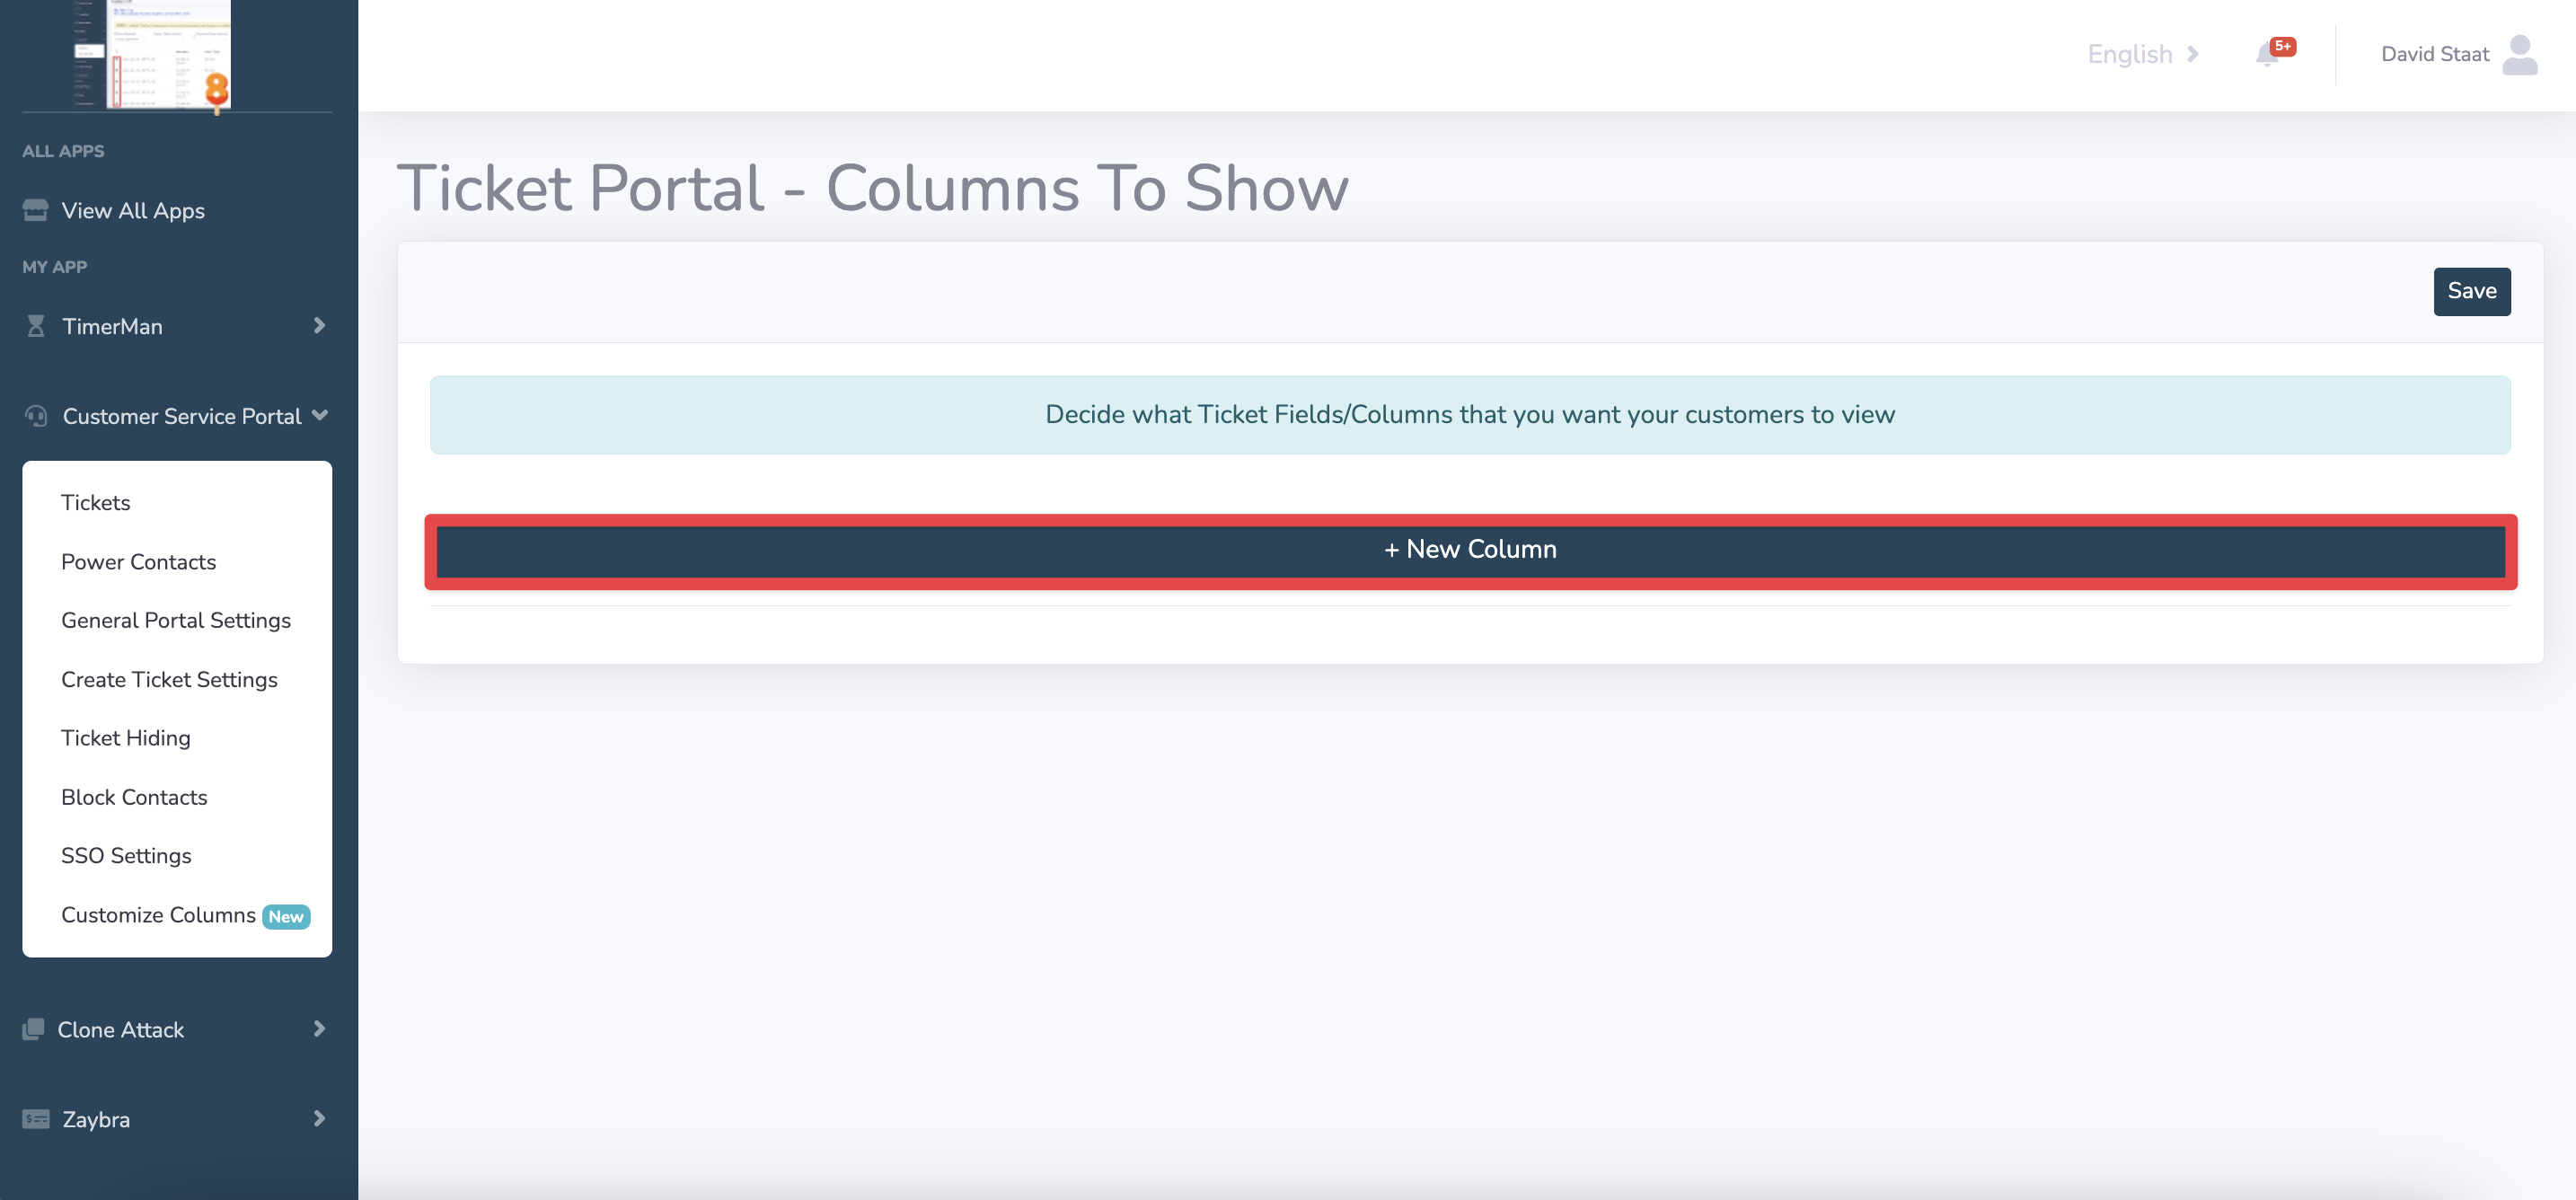
3. Click + New Column.
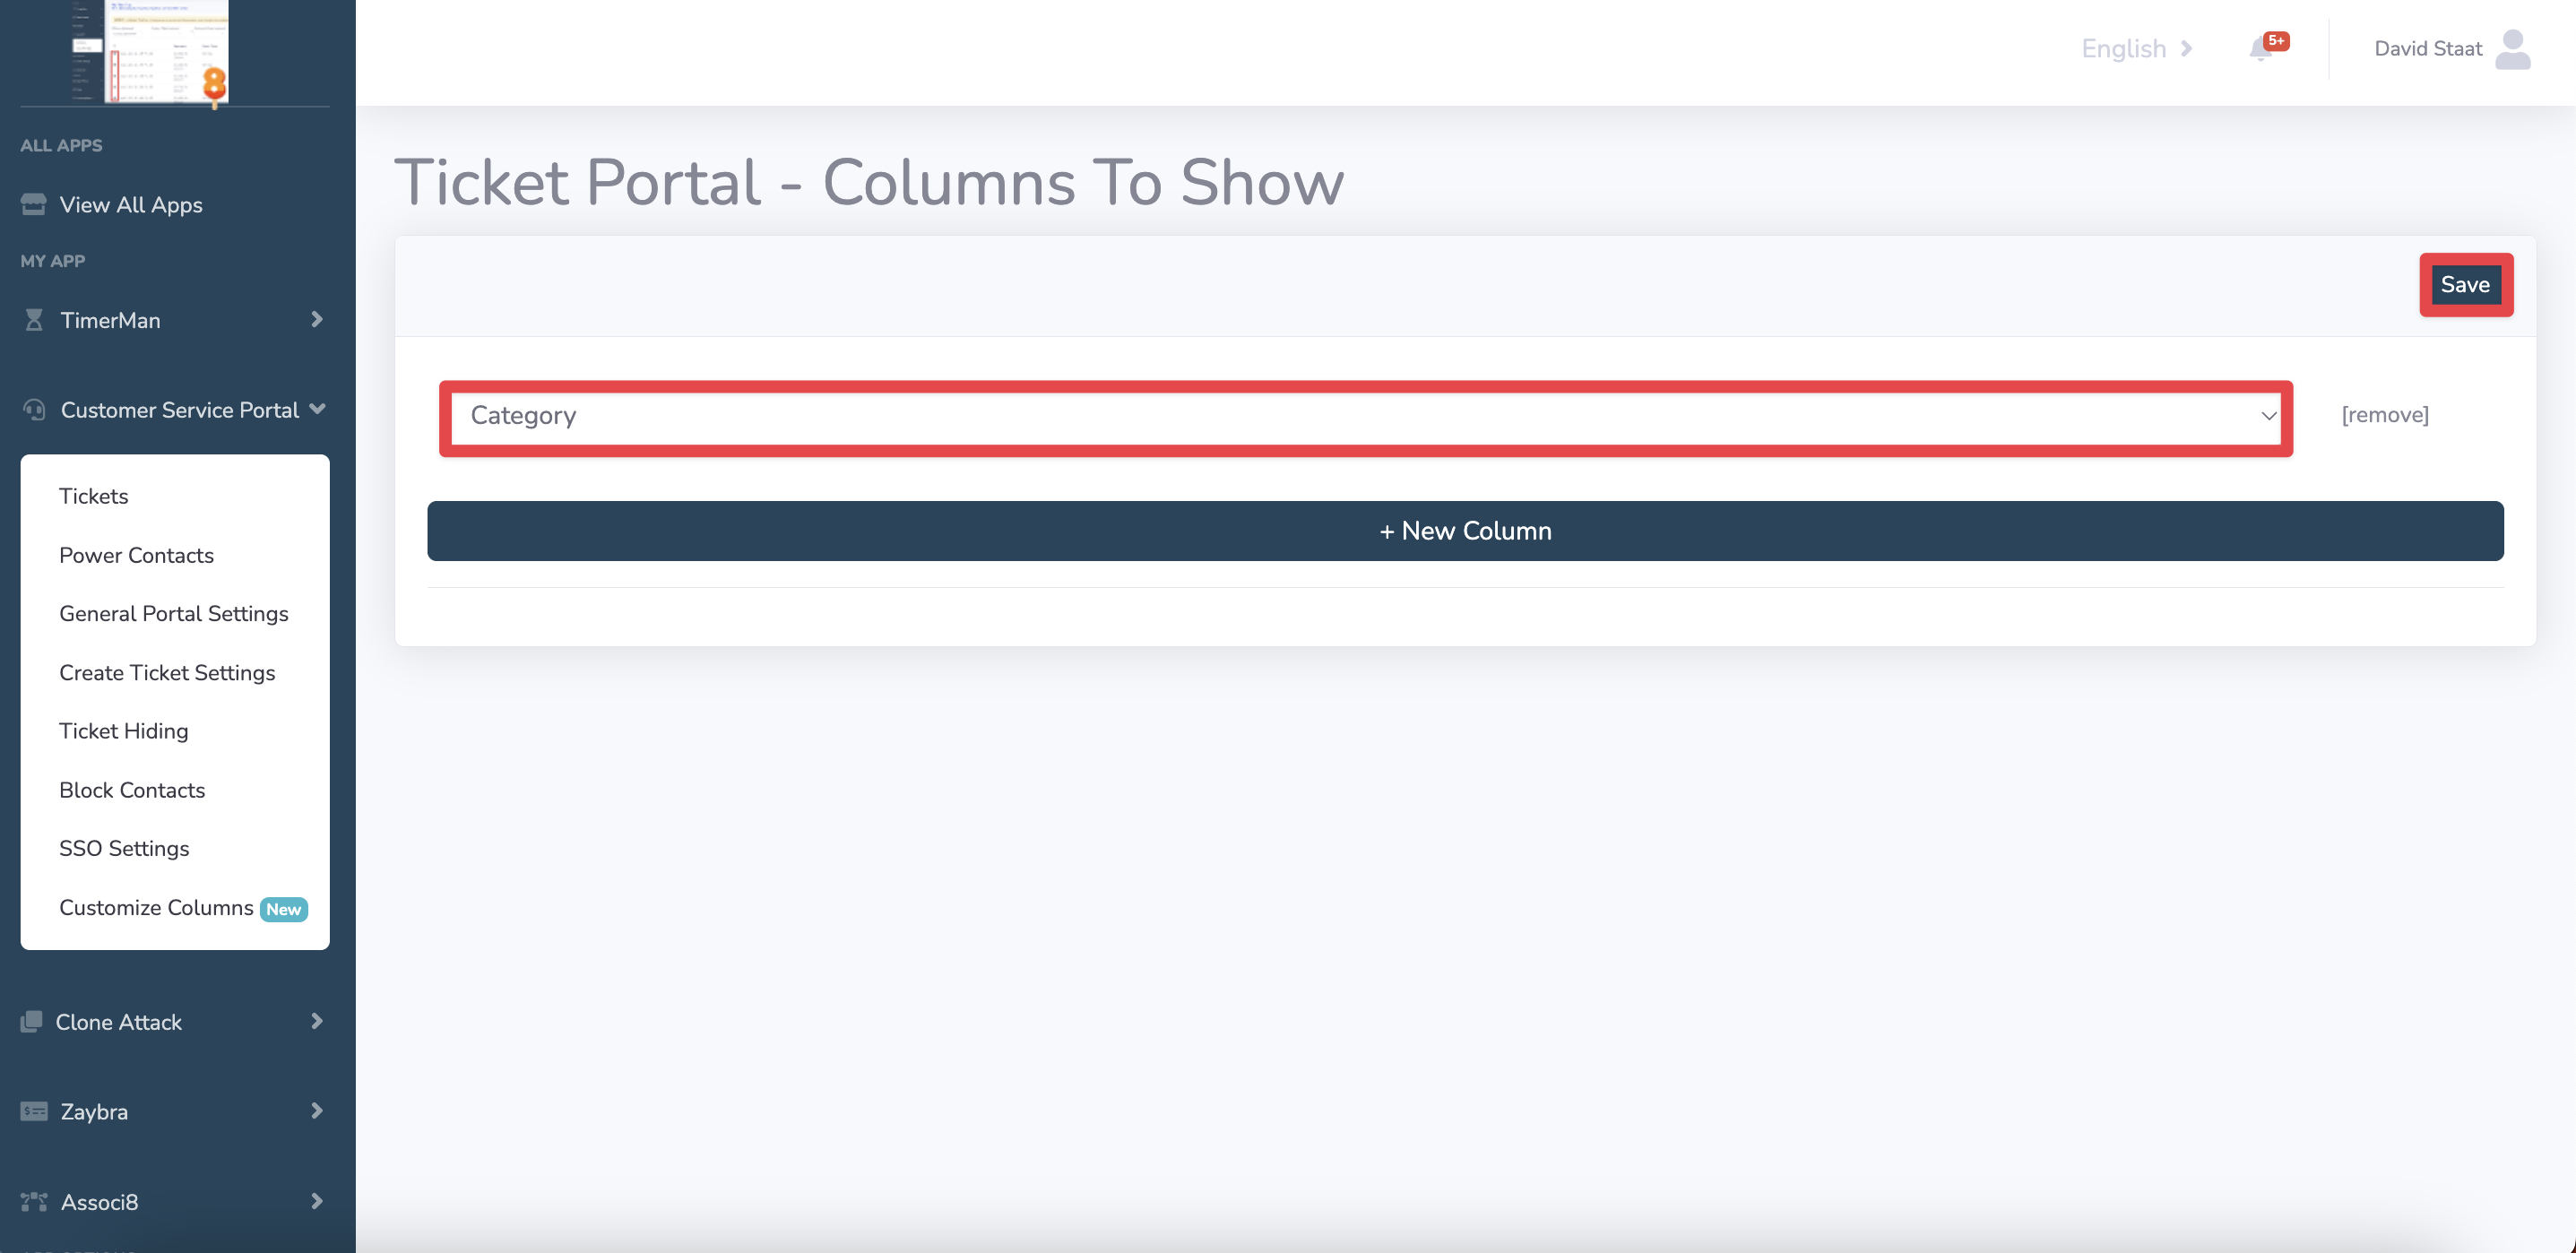
4. Click the new column you just added and select what information will be displayed from the dropdown list!
5. Click Save when you’re done.
6. An important thing to note is that when you add any new columns to your tickets, the default columns will be removed. To restore them, you'll need to either manually add them or remove the new columns you added.
And you're done!
Still have questions? Email us at care@hapily.com