hapily’s Event Meetings tool simplifies how you organize and manage appointments at your events. By setting up dedicated meeting spots and custom scheduling pages, you can easily drive traffic, manage your team's availability, and automatically sync all booking activities directly to your HubSpot portal.
With this approach, you can:
- Create dedicated meeting locations (like specific booths or demo rooms) with set capacities and schedules.
- Build customized scheduling pages for prospects to easily book time with your team.
- Automatically generate calendar invites and log meeting activities inside HubSpot.
- Track on-site attendance and automatically update meeting outcomes in HubSpot upon check-in.
hapily | Event Meetings Overview - Watch Video
Step 1: Configure Meeting Settings
Before setting up your event meetings, you need to define how the tool interacts with HubSpot.
- Navigate to Settings and select Event Meetings.
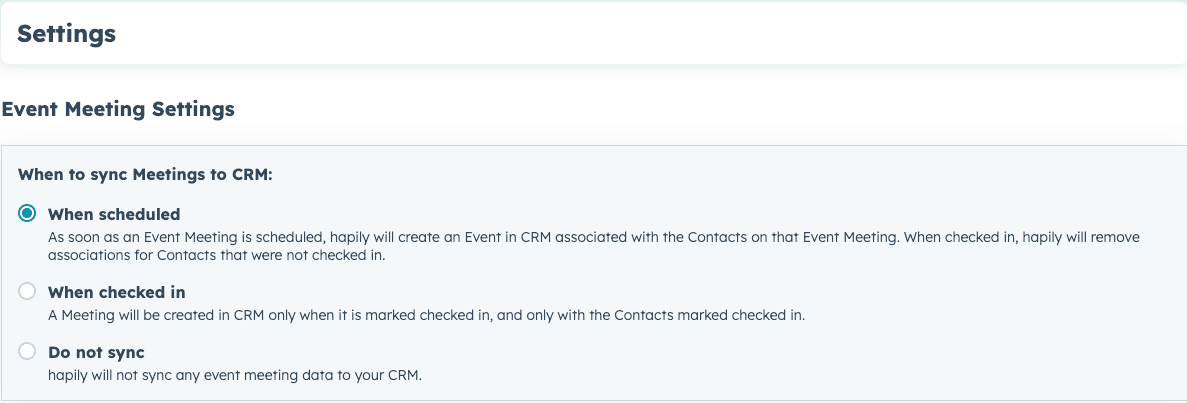
- Define when hapily should create a meeting activity in HubSpot. You can choose to log the meeting when someone books, when they arrive, or opt out of syncing them to HubSpot entirely.
Step 2: Access the Meetings Tab
- Create or open your event in HubSpot just as you normally would.
- Navigate to the Meetings tab on the event dashboard to begin building your meeting spots.
Step 3: Create and Configure Meeting Spots
Meeting spots are the specific locations or options available for attendees to book time with your brand (e.g., "Booth 314" or "VIP Demo Room").
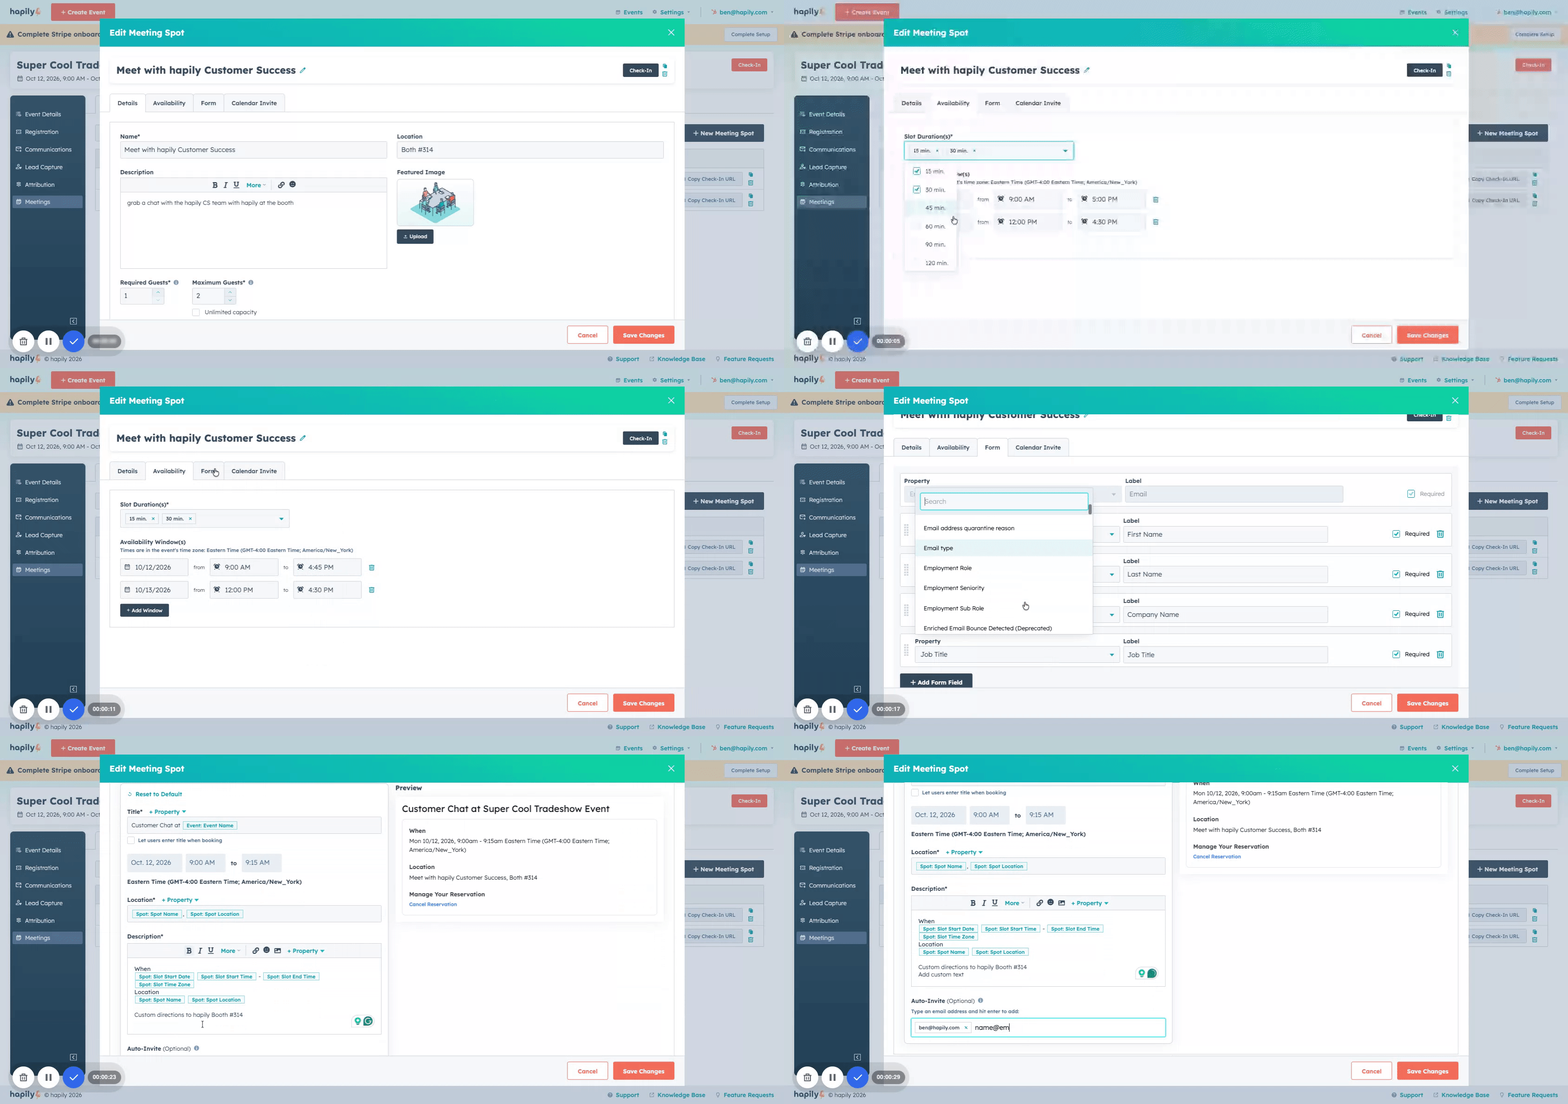
- Add a new meeting spot and give it a name (e.g., "Sales Demo at Booth 314").
- Set the Max Capacity to determine how many people can be added to a single booking (e.g., 4 stools at the booth).
- Enter a Description and select a Meeting Type (this syncs directly to your HubSpot meeting type property).
- Configure optional filters so attendees can narrow down their meeting choices (e.g., filtering for Zoom-enabled rooms).
- Set the individual Availability per day (e.g., 9:00 AM to 5:00 PM on day one, and 12:00 PM to 4:30 PM on day two).
- Select the allowed time Durations that attendees can book (up to two hours).
- Define the required booking information by selecting standard HubSpot Contact Properties (e.g., First Name, Last Name, Company, Job Title).
- Customize the Calendar Invite that attendees will receive. You can modify the title (e.g., "Sales Demo at Super Cool Trade Show") and add custom directions (e.g., "Head to hapily booth #314").
- Assign team members to the spot so that booked slots are automatically pushed to their personal calendars.
- Click Save Spot. (Note: You can easily use the Clone feature to duplicate spots—perfect for quickly setting up an identical schedule for a different team, like Customer Success).
Step 4: Build a Scheduling Page
The scheduling page is the destination link you will send to prospects during your pre-event outreach.
- Create a new scheduling page.
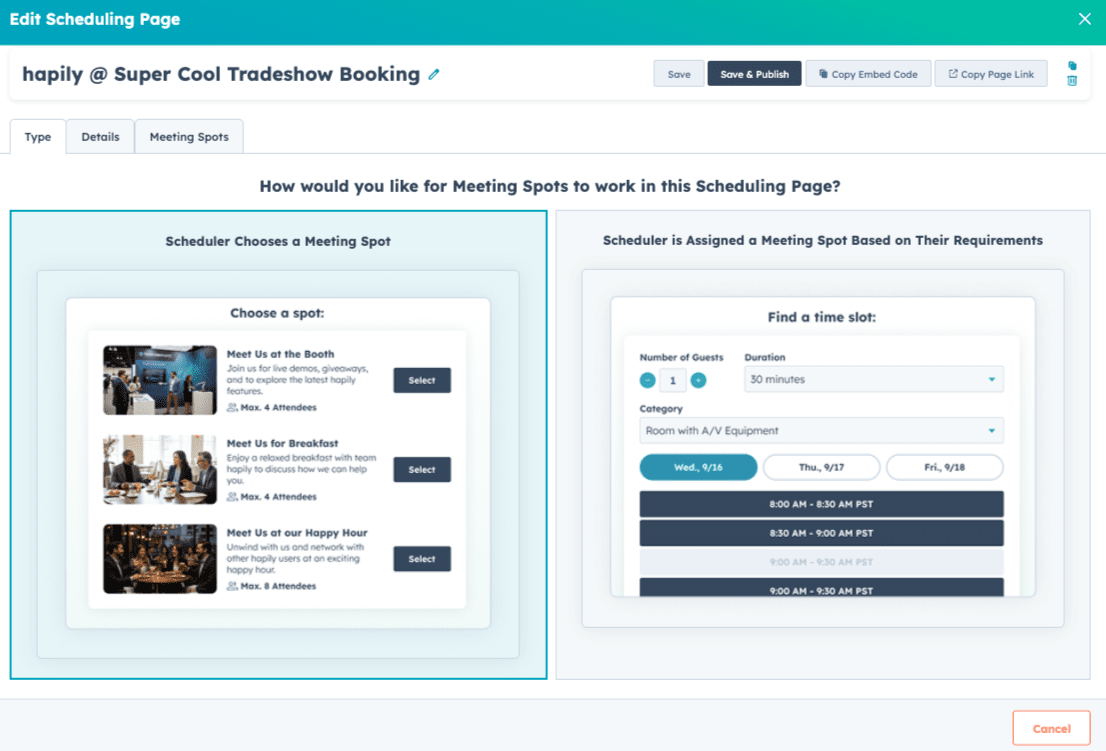
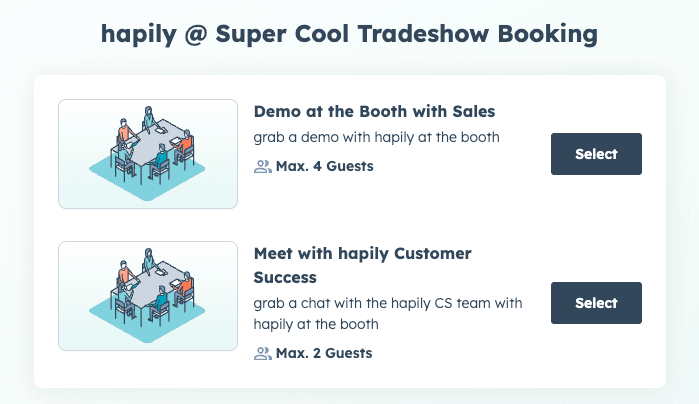
- Define the visibility of your meeting spots. You can allow prospects to see all available spots or restrict visibility based on your needs.
- Choose the selection behavior. You can either automatically assign an attendee to a spot based on their requirements (like party size) or allow them to manually select the experience they want.
- Add a custom, rich-text Description to the page to welcome your guests.
- Choose whether attendees can stack multiple filters or select just one at a time.
- Finish and activate the scheduling page. You can now embed this page on your website or send the direct link to your prospects.
Step 5: The Booking Experience and HubSpot Sync
Once your scheduling page is live, attendees can begin booking time with your team.
- Attendees will open the scheduling page, select their preferred meeting spot, pick an available time slot, and fill out their required information. They can also add extra guests to the invite.
- Upon booking, hapily automatically sends calendar invites to the attendee, their guests, and the assigned team members.
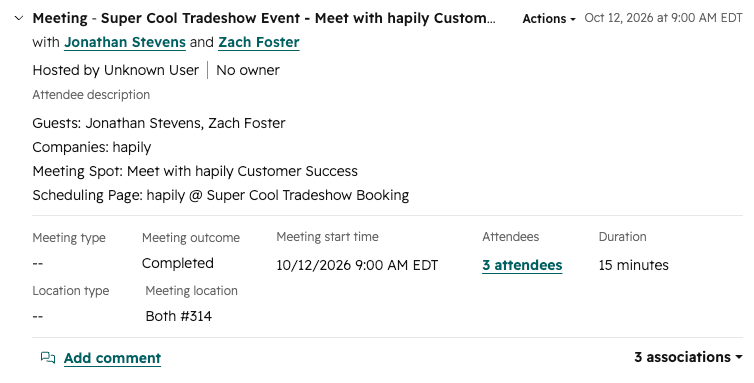
- Inside HubSpot, hapily instantly logs a meeting activity on the contact record. The Meeting Outcome is automatically set to Scheduled, and all guests are associated with the event.
Step 6: Manage On-Site Check-Ins
When it is time for the event, you can easily track who actually shows up for their scheduled meetings.
- Equip your on-site team with either the global check-in page or individual check-in pages tailored to specific booths.
- When the prospect arrives, locate their booked time slot on the check-in page.
- Select the primary contact and any additional guests they brought (you can easily add walk-up guests directly from this screen).
- Click Check-in.
- hapily will instantly update the meeting activity in HubSpot, changing the outcome from Scheduled to Completed and apply an association label to denote their attendance.
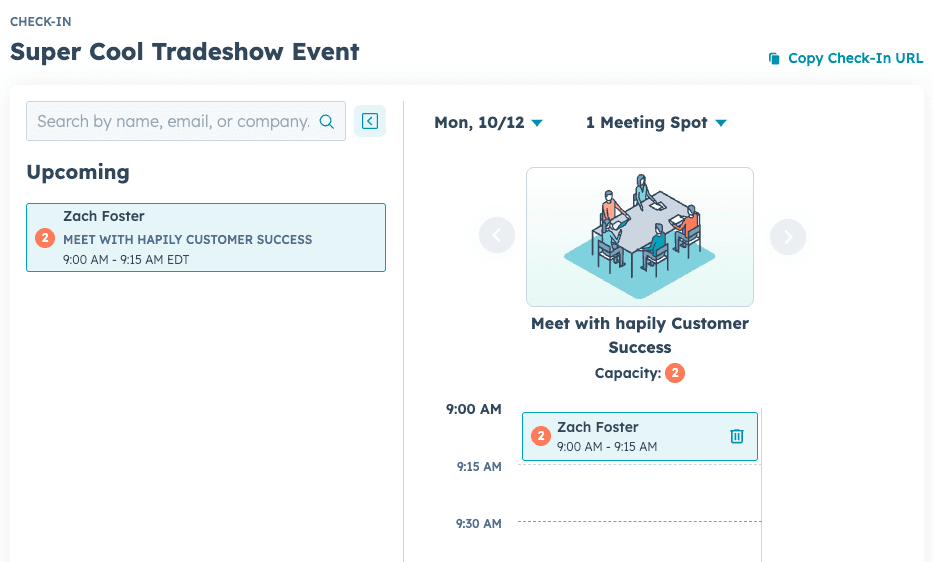
The meeting activity Outcome changes to 'Completed' upon checking someone in for the meeting.