Overview
Every event created with event·hapily automatically includes a dedicated Check-In Page.
This page enables your on-site staff to quickly check in attendees using:
-
A list view of all registrants
-
Search-based check-in (by name, email, company, or any registrant property)
-
QR code scanning for fast, contactless check-in
-
Walk-Up Registration (covered in a separate article)
🎥 Video Walkthrough:
Watch the Check-In Overview Tutorial →

Step 1: Access the Check-In Page
-
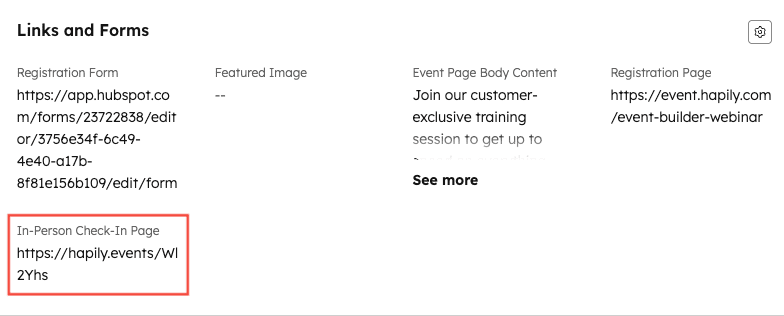
Open your event record in HubSpot.
-
Find the property labeled In-Person Check-In Page.
-
Copy this URL and share it with anyone working the event — it works on:
-
Desktop
-
Tablet
-
Mobile
-
📝 Tip: The URL is unique to the event, ensuring your staff always check in attendees for the correct record.
Step 2: Using the List View Check-In
When you open the Check-In Page, you’ll see a list of all registrants for that event.
Features of the List View:
-
Shows every person registered for the event
-
Displays key registrant details
-
Lets staff check in anyone with a single click
-
Automatically moves checked-in registrants to the Checked-In tab
Searching for Registrants
You can search by any registrant property, including:
-
Name
-
Email
-
Company
-
Registration status
Partial matches work too — typing “HAP” will find all registrants from hapily, “Hub” for HubSpot, etc.
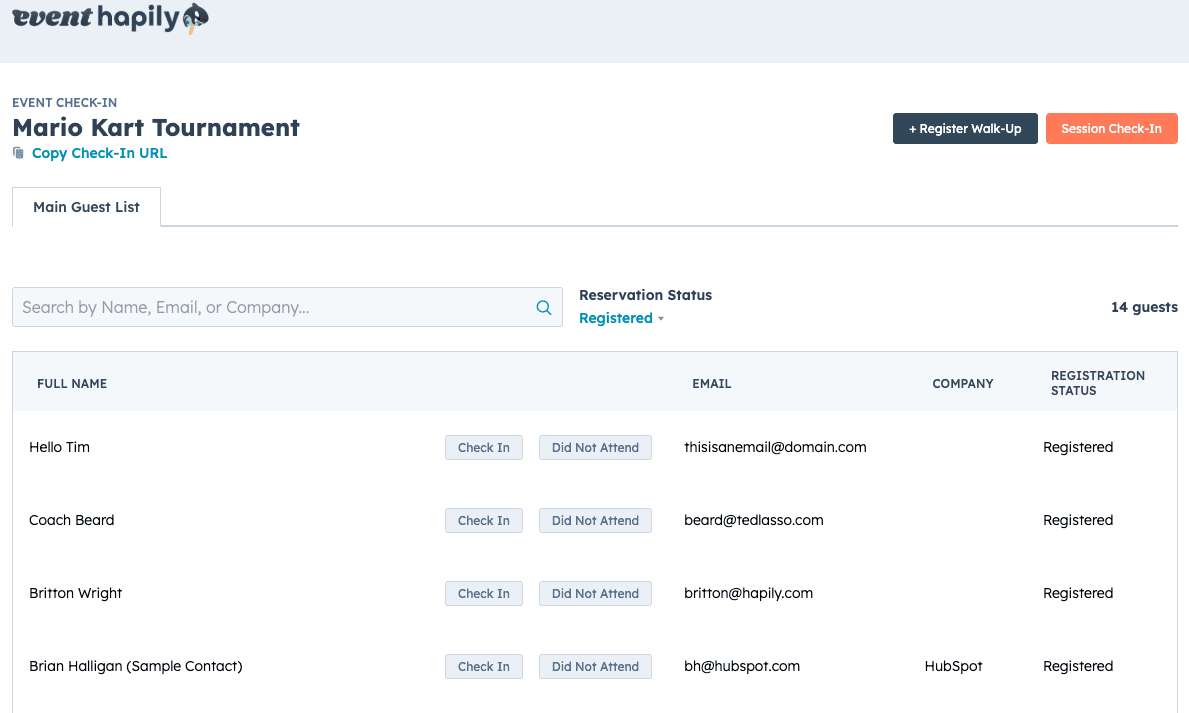
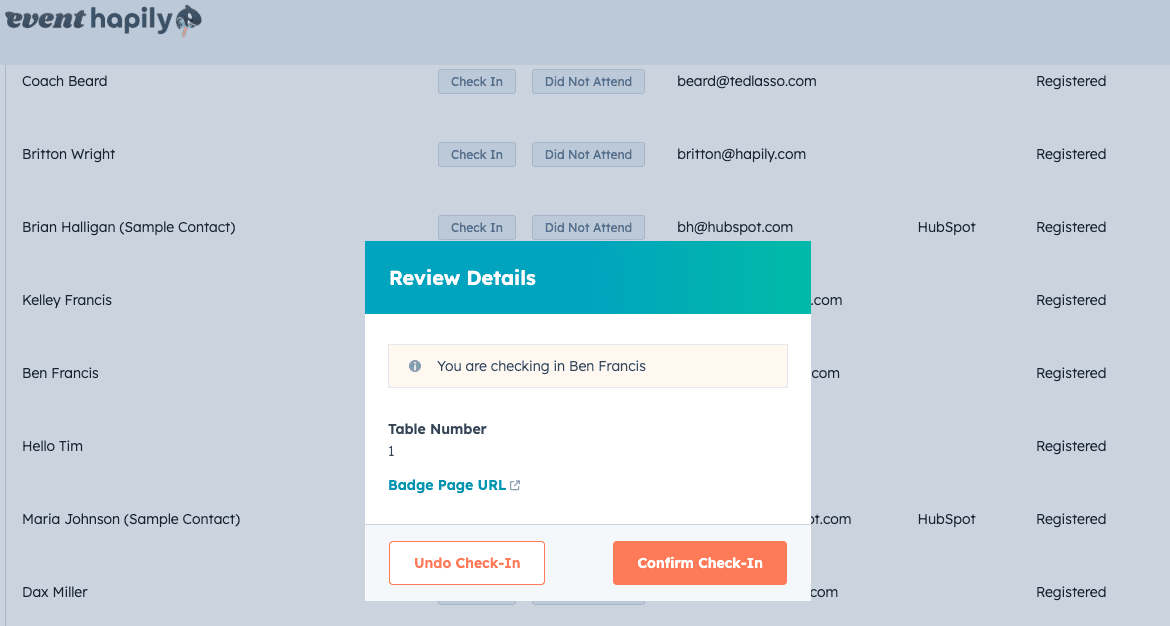
Checking In
Simply click Check In next to a registrant.
This instantly updates their registrant status in HubSpot and moves them to the Checked-In list.
If you're using our Registrant Check-In Details feature, you'll see the properties about that registrant upon check-in.
Step 3: QR Code Check-In (Mobile)
If you’re using mobile or tablet, the Check-In Page supports fast QR code scanning.
-
On mobile, tap Scan QR Code.
-
Your device camera will open.
-
Point the camera at the attendee’s QR code.
-
The registrant is instantly identified and marked as Checked In.
This is ideal for high-volume events, session-level check-in, or any scenario where speed matters.
event·hapily 🐳 | Mobile Check-in Demo - Watch Video

Optional: Walk-Up Registration
The Check-In Page also supports walk-up registration, allowing staff to:
-
Open a HubSpot-form registration form
-
Register a new attendee on the spot
-
Automatically create a new Registrant record
-
Immediately mark them as Attended
This feature is explained in detail in the companion article:
👉 How To | Walk-Up Registration - link here
Summary
event·hapily’s Check-In Page gives your team a fast, flexible way to manage attendee arrival:
✅ Search and check in registrants from a list
✅ Scan QR codes using any mobile device
✅ Automatically update registrant status in HubSpot
✅ Support new walk-up registrations
✅ Works on phones, tablets, and laptops