Welcome to the event setup process! This document walks you through the steps to create and configure an event using event•hapily. By following this guide, you can efficiently create an event, set up emails and communications, handle registrations, check-in, and more.
Step 1: Create the Event Record using Event Builder
Video Overview: Event Builder
Creating Events with Event Builder: A Step-by-Step Guide - Watch Video
Step 2: Add your event details
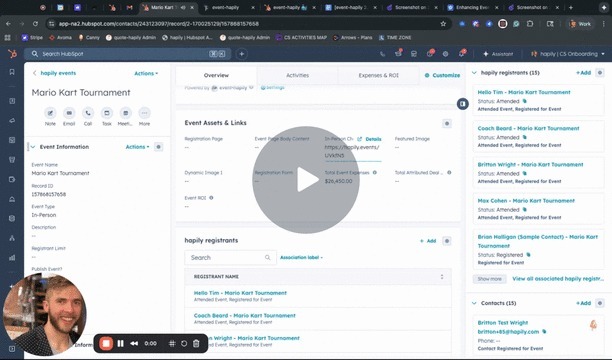
Start by creating the event record, where you'll input all essential details. The featured image and page body content will be shown on the landing page directly from the event record.
- Featured Image: URL to the image that will be displayed on the landing page (if your team is using dynamic content)
- Page Body Content: Add any information about the event here. It is a rich text field so bullets, images, video embeds, etc are all permitted.
- Registrant Limit: How many people can sign up for this event
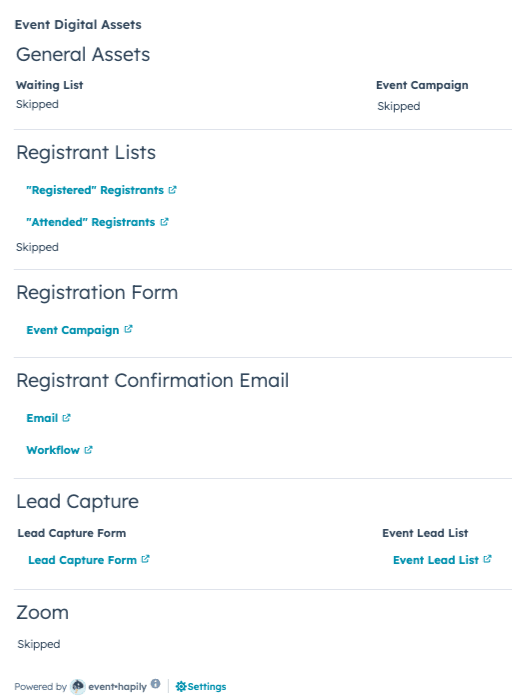
Step 3: Review your Event Digital Assets
- Check out the Landing Page created by event·hapily & make any needed changes
- Publish your landing page!
- Review the workflow created by Event Builder, add additional steps like event reminders (video)
Enhancing Event Registration Workflows with Reminder Emails - Watch Video
- Publish your workflow for this event!
Step 4: Review Event Comms Workflows
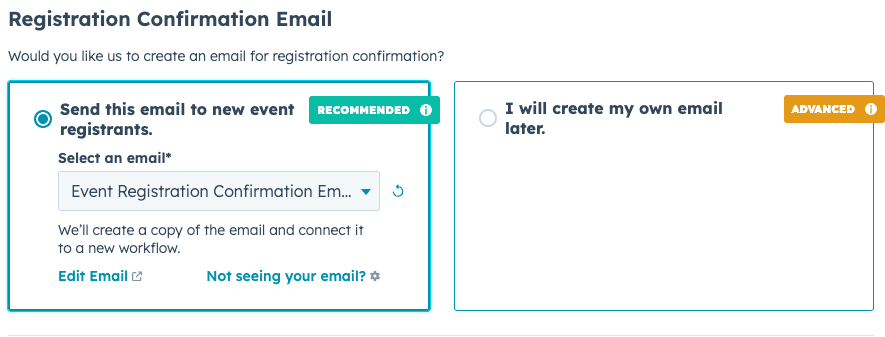
Hapily’s Event Builder can automatically create a registration confirmation email workflow for you by selecting the option to ‘Send this email to new event registrants’ which will clone the email you select from the dropdown and add it to a new workflow specific to this new event record.
To add reminders to this workflow, feel free to follow along with this video demo:
event·hapily Overview | Registration Confirmation Workflow + Reminders - Watch Video
For Custom Emails and Flows:
If your event requires custom email communications or specific workflows:
- Create Custom Emails: Design the emails that will be sent at various stages of the event
- Be sure to add REGISTRANT tokens to your emails
- Create a Custom Workflow: Set up a hapily registrant-based workflow with your desired delays and send email actions.
- Enable the workflow so when registrants are created for this event, they will be enrolled in the workflow and receive emails.
Step 5: Check-In
QR Codes:
QR codes will be automatically generated for your registrants and can be sent in the confirmation email. They can be scanned with any scanning app or service on any device! Read more about QR codes here.
event·hapily has email templates ready to use in your HubSpot account
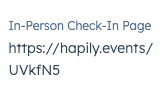
Check-In Page:
An ‘In-Person check in page’ will be created automatically whenever an event is created. You can find this directly on your event record in HubSpot. Feel free to share this URL with any event staff (no HubSpot access required) to check in registrants for the event.
event·hapily Check In Overview - Watch Video
Walk Up Registration:
Optional: Event Expenses
Check out the support documentation here - https://docs.hapily.com/eventhapily/event-expenses
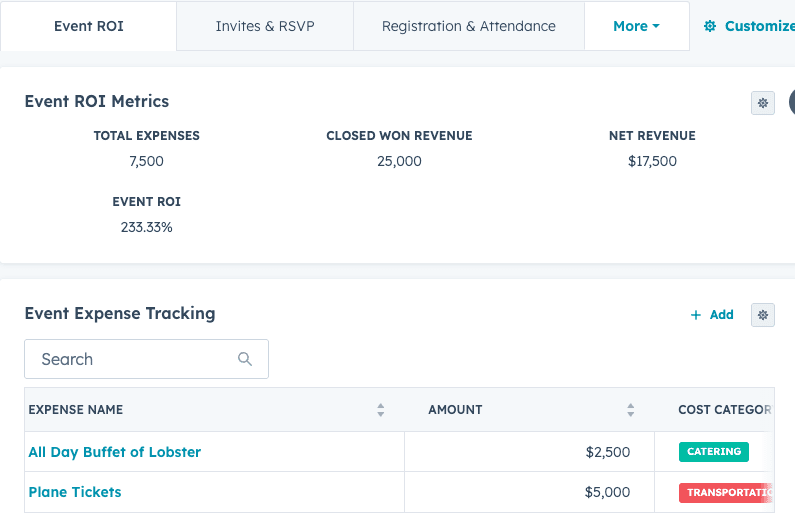
This is a Custom Object so you can modify any of the properties as you see fit. The Amount fields are what total up and help calculate the ROI.
Optional: Reporting
Event Object Middle Panel:
In the middle panel of the event record you can see some rollup fields displayed.

You can add more reports here by creating single object reports that can be filtered to only associated records. Check out HubSpot’s documentation or reach out to care@hapily.com if you’d like to learn more.
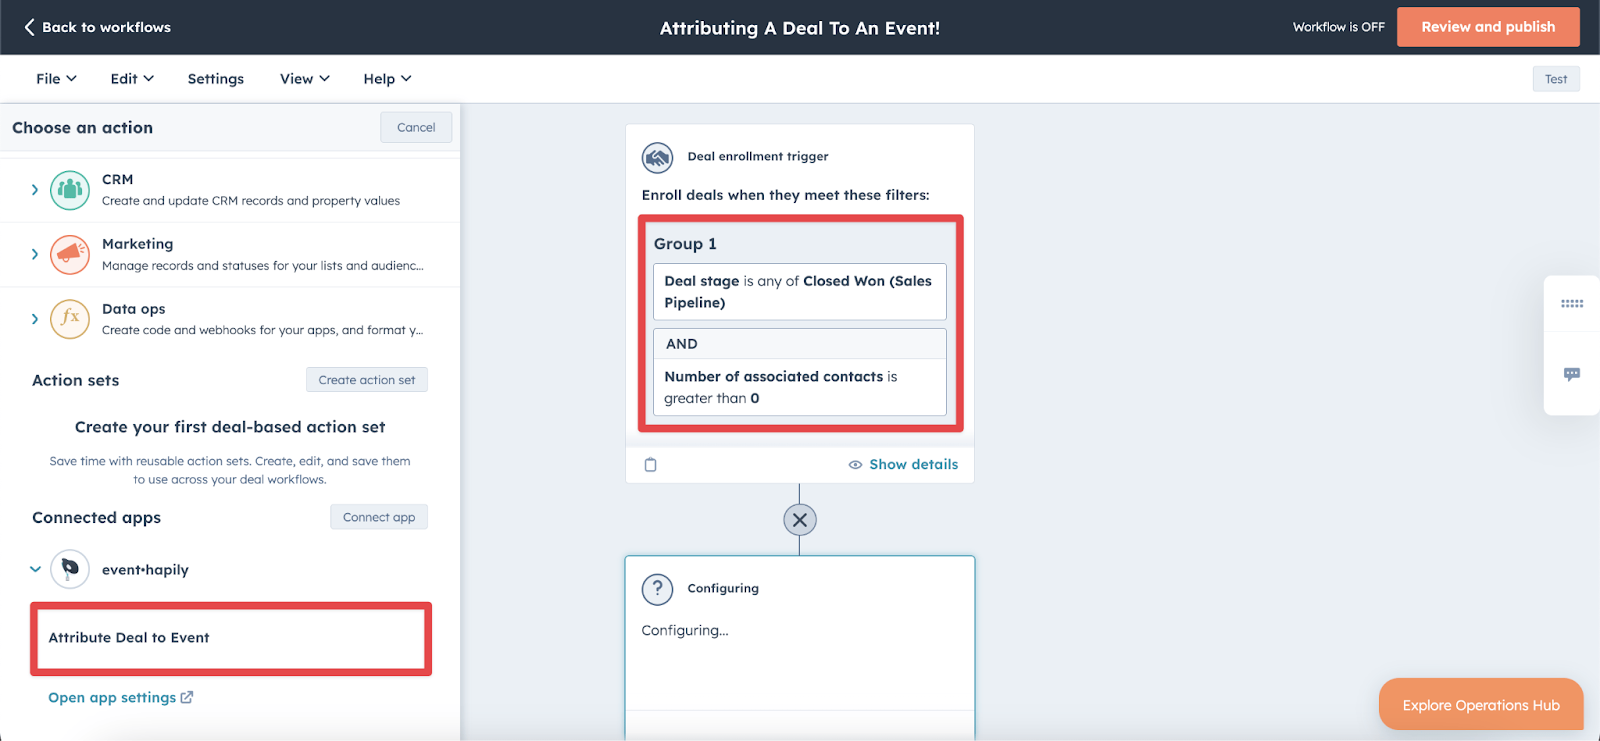
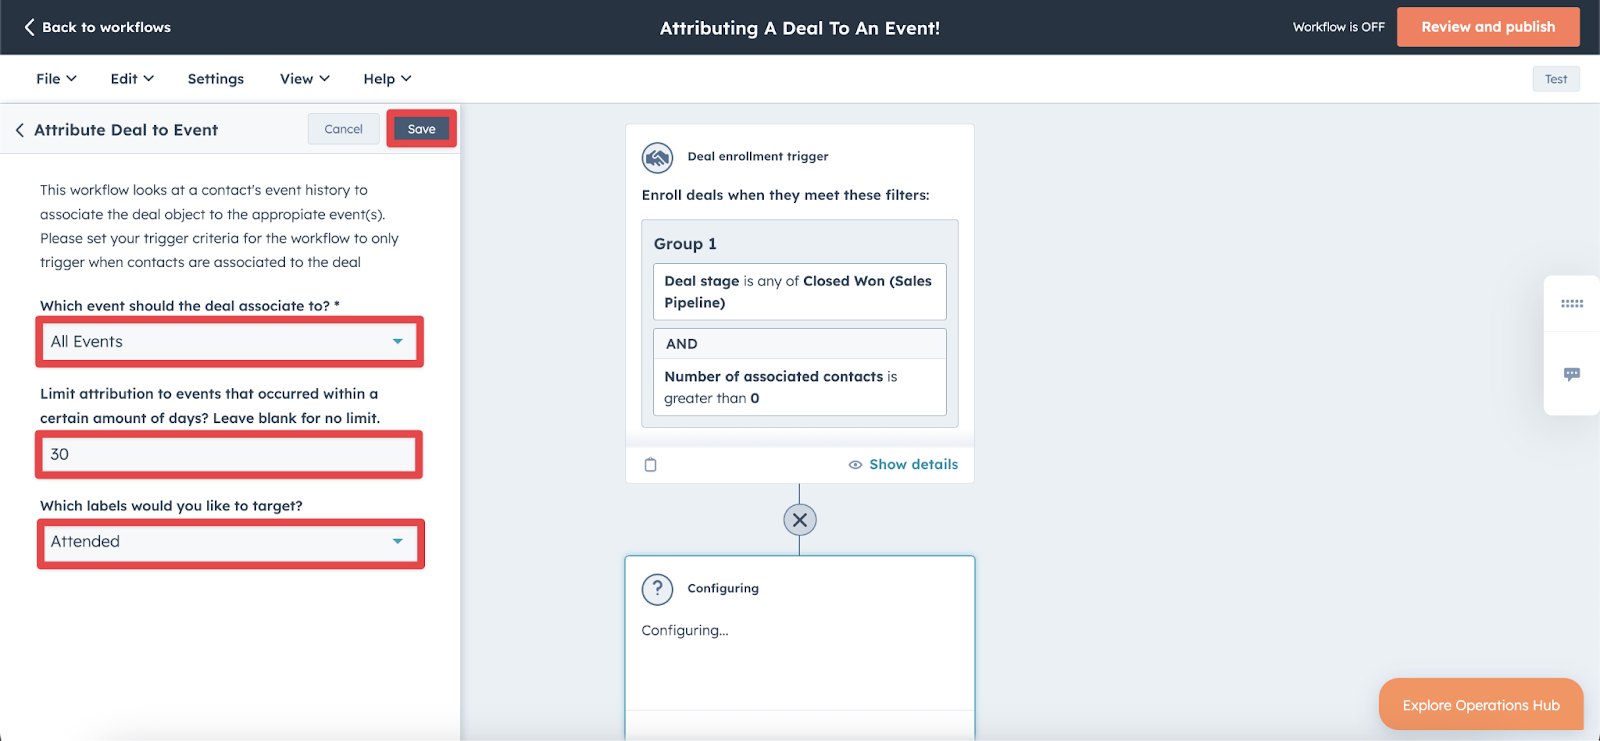
Optional: Attributing Deals to Events
Check out the support documentation here - https://docs.hapily.com/eventhapily/how-to-automatically-attribute-deals-to-events-with-eventhapily
Let’s start by building a workflow to Attribute deals to the event/s based on that Contact to Event association.
- Deal Workflow Enrollment Criteria: This workflow will be triggered when a deal has a contact associated with it, or when the number of contacts linked to the deal is updated.
- Attribute Deal To Event Workflow Action: The workflow action will look at the contact’s event history to associate the deal to the relevant event(s).
- Which Event Should the Deal Be Associated With?
- First Event: Associates the deal to the first event the contact attended.
- Most Recent Event: Associates the deal to the most recent event.
- All Events: Associates the deal to all events the contact has attended.
- Time Frame for Event Association: You can specify a time frame (e.g., 365 days) for event association, or leave it blank for no limit.
- Label Targeting: You can choose to target specific labels:
- Event Lead: For contacts marked as leads
- Attended: For contacts who attended the event.
- Registered: For contacts who registered but didn’t attend.
- Consider Company for Event Participants:
- If you select Yes, events associated with any contact at the enrolled contacts will be considered.
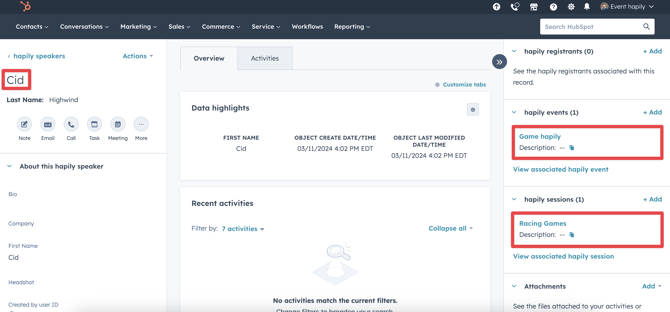
Optional: Speaker Setup
A hapily speaker is an instance where one of your HubSpot Contacts becomes a speaker for a hapily event. Each Contact will have an individual Speaker record for each Event he or she is speaking for (Same as a Registrant record).
Each Speaker will associate to its respective Contact, Event, and Session(s).
event·hapily Overview | Event Speakers - Watch Video
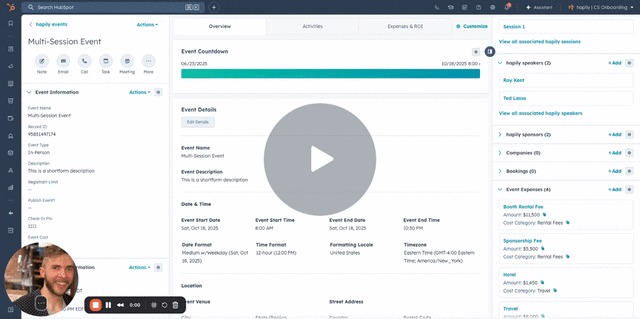
Optional: Sessions
If your event will have multiple sessions, you can create additional sessions as event records. As a reminder, the registration limit will be managed on the session level if you have multiple sessions.
- Review and Adjust Session Information: You will need to modify the session-specific details such as:
- Session Name: Customize each session’s name if needed.
- Session Description: Adjust the session descriptions to match the event agenda.
- Session Registrant Limit: Set the maximum number of registrations for this session
-
- Location: Update the location for each session if it's different from the event location.
- Session Time: Set the exact time for each session.