Using Registrant-Based Emails in HubSpot
Overview
The Registrant Object in event·hapily is the key to sending personalized, event-specific emails in HubSpot.
Each registrant record represents a snapshot in time — linking a specific contact to a specific event. It contains both contact information (like name and email) and event context (like event name, time, location, and status).
Using registrant-based personalization tokens and registrant-based workflows, you can send confirmation and reminder emails that automatically include the correct event details for each person.
🎥 Video Walkthrough:
Watch the Registrant-Based Email Tutorial →

Step 1: Understanding the Registrant Object
Every registrant record contains:
-
Event Details: event name, date/time, venue, and links
-
Registrant Information: contact, status, and check-in details
-
Dynamic Data: feedback, QR code, and personalized calendar links
Because each registrant is unique to a single event, sending emails from the Registrant Object ensures your communication always references the correct event data.
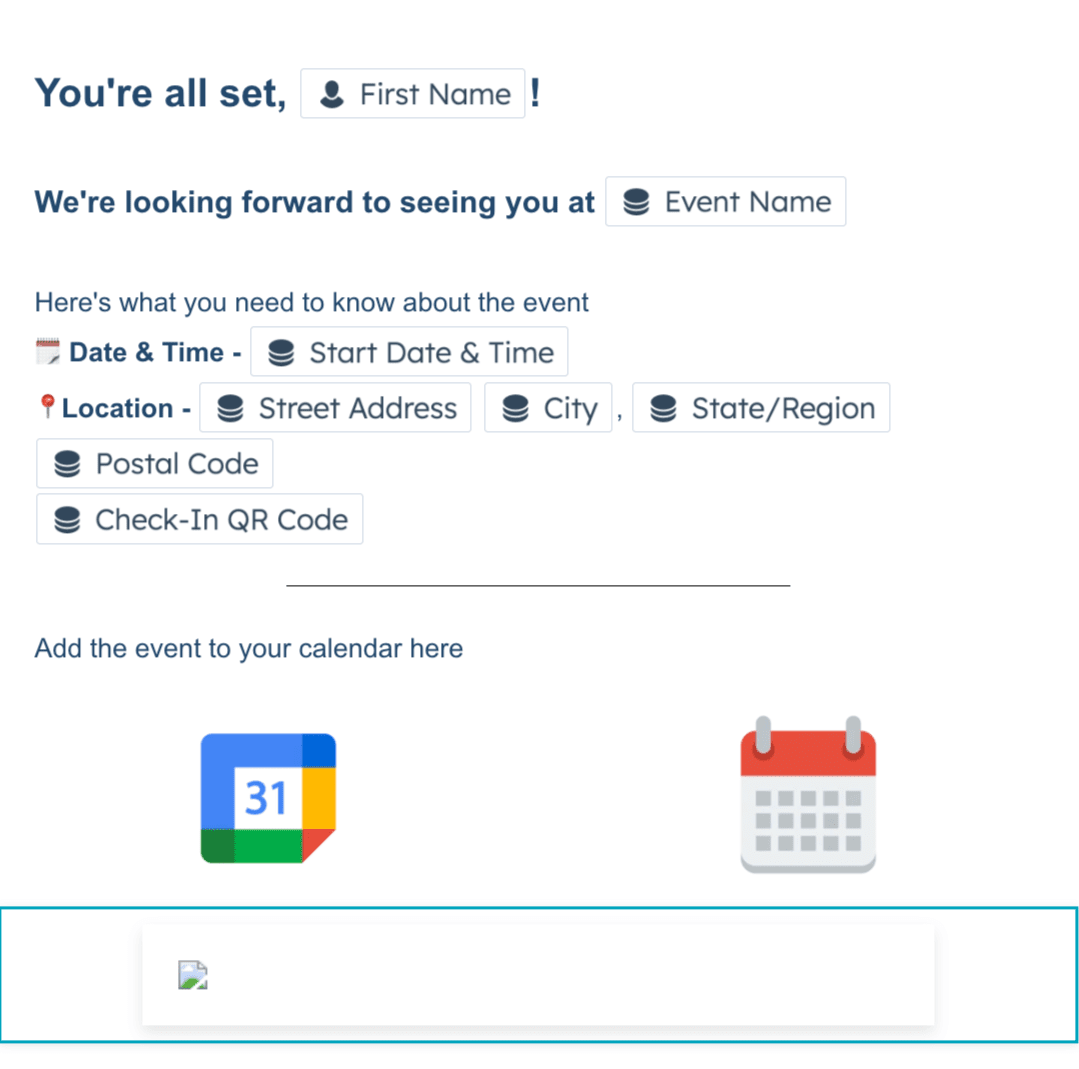
📸 Screenshot placeholder: Example registrant record showing event name, time, and QR code
Step 2: Create a Registrant-Based Email
-
In HubSpot, go to Marketing → Email.
-
Click Create Email and choose a template (confirmation, reminder, or thank-you).
-
In your email editor, use personalization tokens from the Hapily Registrant object, such as:
-
Event Name:
-
Display Start Date:
-
Display Start Time:
-
Venue:
-
Google Calendar Link:
-
ICS Calendar Link:
-
QR Code:
-
📝 Tip: You can also use registrant tokens in the subject line, for example:
Subject: “You’re confirmed for !”
Step 3: Embedding the Registrant QR Code (Optional but Recommended)
To display the QR code for check-in directly inside your confirmation or reminder emails:
-
Drag an HTML block into your email layout.
-
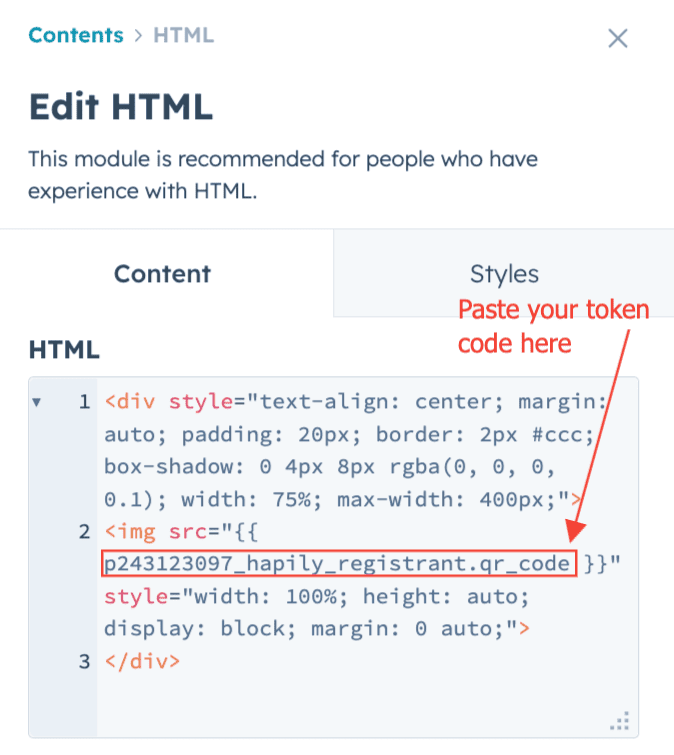
Paste the following sample HTML snippet (adjust padding or style as needed):
<div style="text-align: center; margin: auto; padding: 20px; border: 2px #ccc; box-shadow: 0 4px 8px rgba(0, 0, 0, 0.1); width: 75%; max-width: 400px;">
<img src="" style="width: 100%; height: auto; display: block; margin: 0 auto;">
</div> -
Save your email.
The image will automatically render the unique QR code tied to the registrant record.
Step 4: Build a Registrant-Based Workflow
-
Navigate to Automation → Workflows → Create from Scratch.
-
Choose Object Type → Hapily Registrant.
-
Set up your enrollment triggers — for example:
-
Registration Confirmation: when a registrant is created
-
Reminder Emails: when the event date is approaching
-
-
Add a short delay (e.g., 2 minutes) to allow HubSpot to sync data.
-
Add a Send Email action and select your registrant-based email.
📸 Screenshot placeholder: Workflow enrollment trigger set to Registrant object
Example: Multi-Step Reminder Workflow
You can easily layer reminder emails around your event’s start date:
-
Trigger: When registrant is created
-
Send Email: Registration confirmation (immediately or after 2-minute delay)
-
Delay Until Date Property: 7 days before event start date
-
Send Email: “One Week Reminder”
-
Delay Until Date Property: 1 day before event start date
-
Send Email: “Tomorrow’s the Big Day”
💡 Pro Tip: Use a branch to separate registrants who signed up fewer than 7 days before the event, ensuring they still receive the correct reminders.

Summary
✅ Use registrant tokens to dynamically personalize event communications
✅ Embed QR codes and calendar links directly in emails
✅ Build registrant-based workflows for confirmations and reminders
✅ Combine with Event Builder for scalable, automated event communication
Next Steps: