With the hapily Lead Capture app, you can instantly follow up with new leads by generating AI-powered emails directly from your inbox. This feature allows you to take the notes and data captured during an interaction and transform them into a structured, professional outreach email with a single tap.
This approach allows you to:
-
Edit the AI prompt to match your company’s specific tone and positioning.
-
Utilize personalization tokens from hapily and HubSpot data sources.
-
Test and refine your email output using real lead data before going live.
-
Ensure every outbound email includes critical details like meeting links, next steps, and company info.
🎥 Video Walkthrough:
Streamlining Lead Capture with Automated Email Generation - Watch Video

Step 1: Navigate to Email Prompt Settings
-
Log into your hapily dashboard.
-
Select the Lead Capture tab from the main navigation.
-
Click on Email Prompt to open the customization interface.
Step 2: Customize the AI Prompt
-
Review the pre-generated prompt in the main text area. This prompt tells the AI how to structure your email based on captured data (e.g., Lead Name, Notes, Interests).
-
Tweak the instructions to reflect your brand's unique tone, messaging, or positioning.
-
Use the Personalization Tokens to pull in dynamic data. To add a new token:
-
Click the + Property icon.
-
Search for properties related to the Lead, Event, User, or External Enrichment data.
-
Select the property to insert it into your prompt.
-
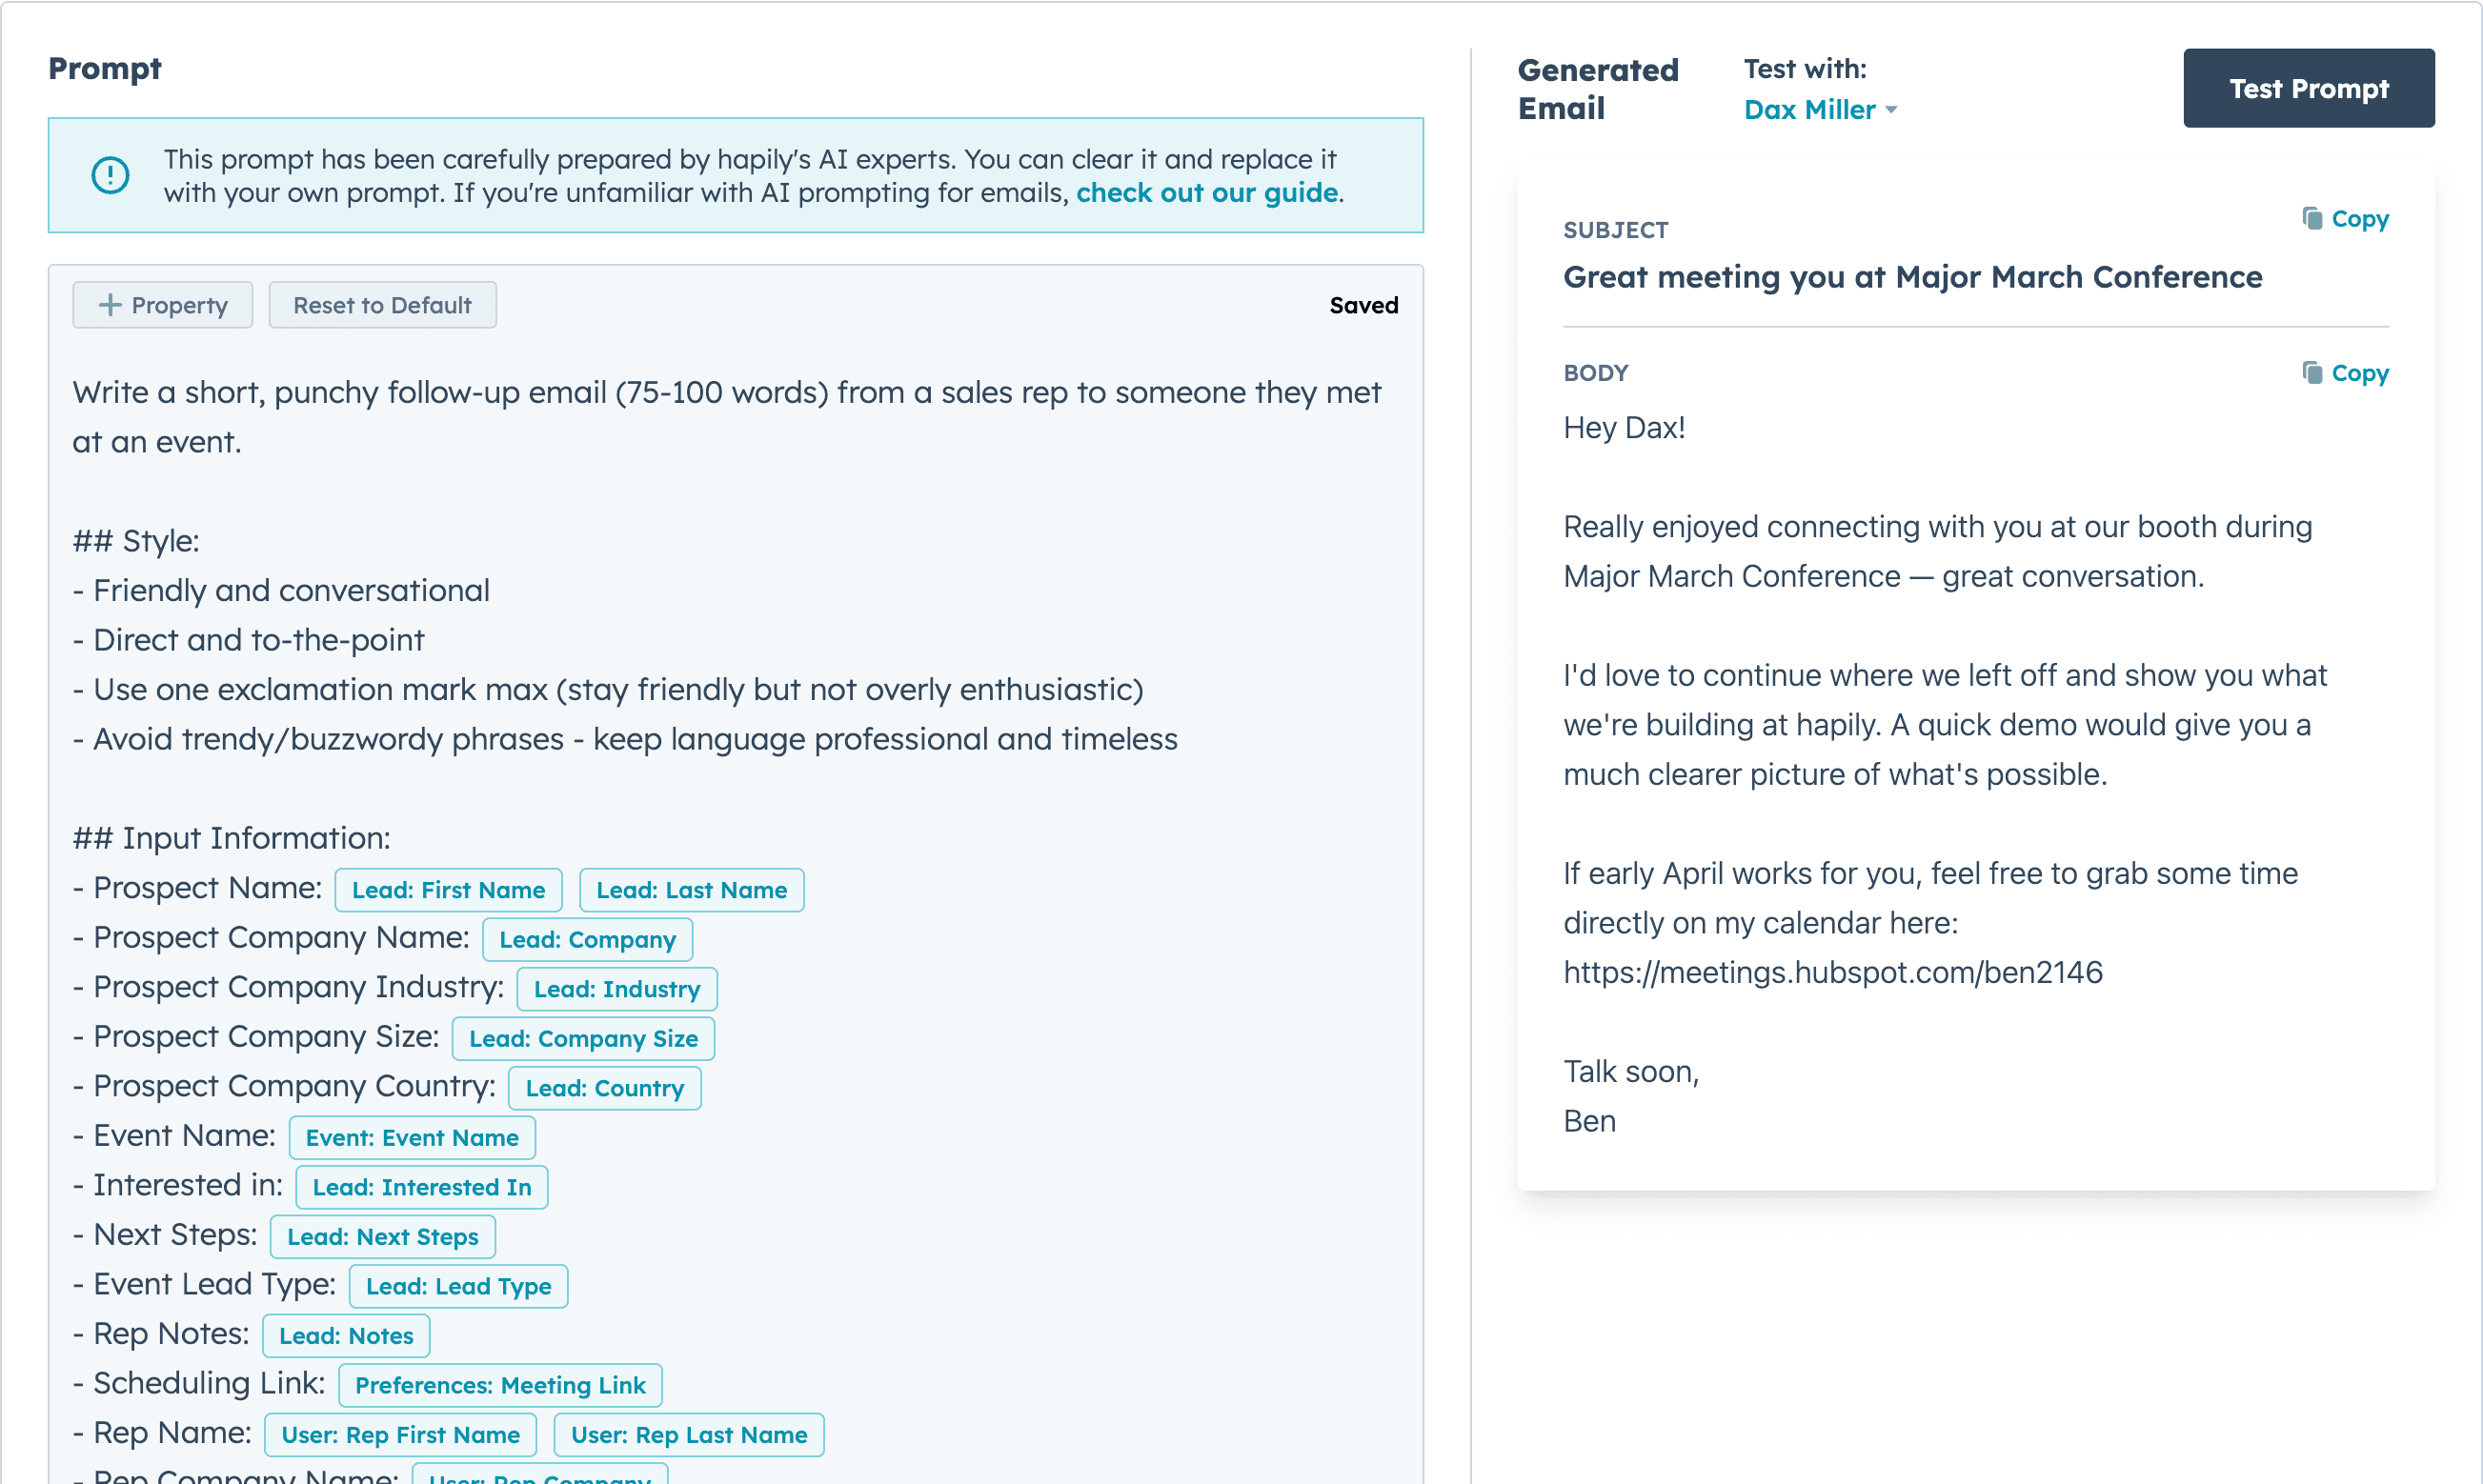
Step 3: Test Your Prompt
-
Navigate to the testing panel on the right side of the screen.
-
Select a specific Event and a Lead from the dropdown menus.
-
Click the test button to generate a sample email based on your current prompt.
-
Compare the output to your desired result and refine the prompt text as needed.
Step 4: Save or Reset Changes
-
hapily features an Auto-save function. Look for the Saved notification in the top right corner to ensure your changes are live.
-
If you want to revert to the original settings, click the Reset to Default button to restore the standard hapily prompt template.
Summary
✅ Successfully navigated to the Lead Capture Email Prompt settings. ✅ Tailored the AI instructions to match brand voice. ✅ Integrated dynamic properties using personalization tokens. ✅ Validated the email output using the built-in testing tool. ✅ Verified that changes were captured via the auto-save indicator.
Next Steps: