
Managing event communications effectively requires balancing automation with flexibility. By leveraging HubSpot alongside hapily, you can choose an email delivery method that perfectly fits your team's operational style and event frequency.
This approach allows you to:
- Understand the three core methods for event messaging.
- Evaluate the pros and cons of manual scheduling versus automated workflows.
- Dynamically insert event details using personalization tokens.
- Automate enrollment criteria for unique or recurring event journeys.
🎥 Video Walkthrough:
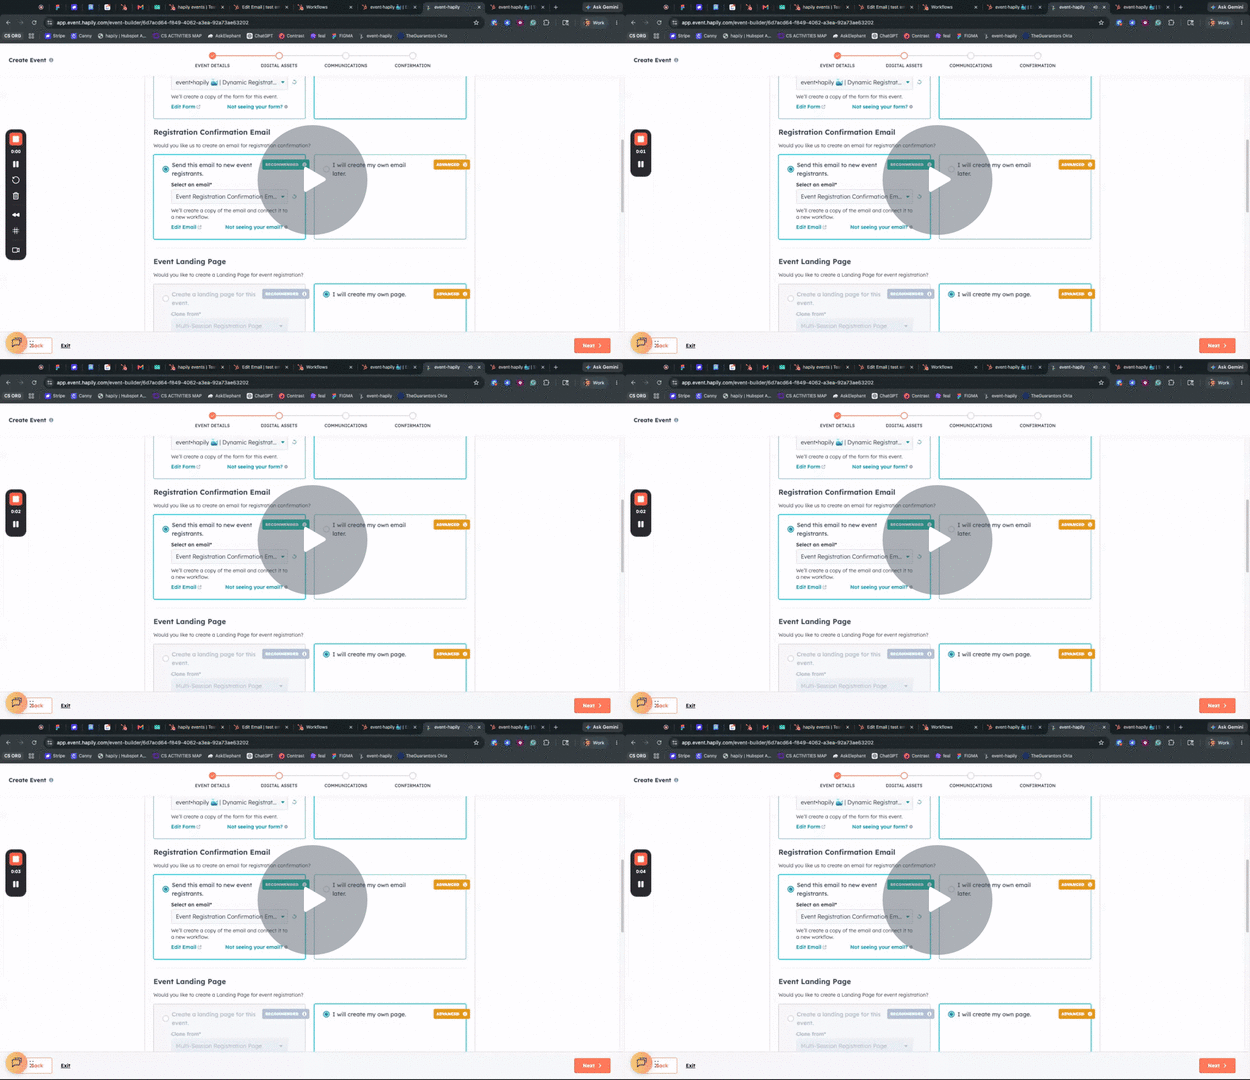
Event Confirmation and Reminder Email Options - Watch Video
Strategy Comparison
| Communication Method | Pros | Cons |
| Scheduled, Contact-Based Emails | Hyper-flexible; allows last-minute copy and timing changes. | Requires manual execution and copywriting; not automated. |
| Global Automated Workflows | Completely hands-off; highly scalable; handles full end-to-end customer journeys. | Content and timing lock upon enrollment; rigid for unique events. |
| Event-Specific Workflows (via hapily) | Tailored copy/timing for specific events; automatically generates enrollment triggers. | Requires a new workflow setup per event (though mostly automated by the system). |
Step 1: Scheduled, Contact-Based Emails
- Build your targeted segment list using the automatic outputs from the hapily Event Builder (e.g., a list generated for everyone who has registered for your specific event).
- Draft a traditional contact-based email within HubSpot.
- Schedule the email manually to go out to your list at a designated time. This method is ideal if your messaging copy or timing needs to change right up until the last minute.
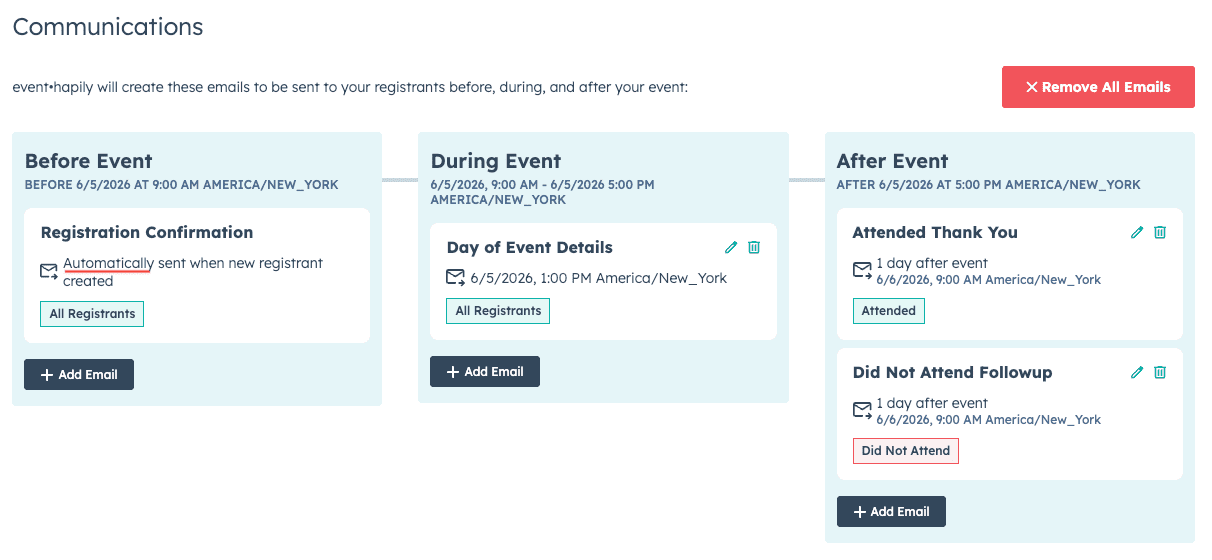
hapily's Event Builder can help you automatically create Contact-based emails from the 'Communications' tab as you make the event.
Step 2: Global Automated Workflows
- Create a single master workflow in HubSpot that triggers when a registration occurs and matches global criteria, such as a specific Registration Type.
- Add automated communication actions and delays to build a complete drip campaign (e.g., send immediately upon registration, delay until one week before the event, delay until one day before, and execute post-event follow-ups based on attendance).
- Use personalization tokens from the registrant record (pulled directly from the hapily registrant object) to dynamically insert the event name, location, date, time, meeting length, and calendar links.
⚠️ Note: Once a user registers and enrolls, their communication timeline and content are locked in. This method is best for teams running frequent events with static communication journeys.
Step 3: Event-Specific Workflows via hapily Event Builder
- Navigate to the hapily Event Builder during your event configuration process.
- Select Yes on the prompt to automatically generate a workflow unique to this specific event.
- Clone an existing HubSpot email template containing your pre-configured personalization tokens.
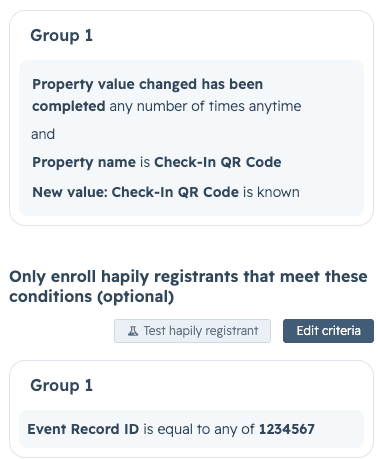
- Let hapily automatically create the new workflow, apply the exact record ID enrollment trigger for that specific event, and insert the send-email step using your selected template. You can then open this unique workflow to manually tailor the copywriting and timing before publishing.
Summary
✅ There are three main ways to manage event communications: manual contact-based lists, global automated workflows, and event-specific workflows.
✅ Scheduled contact-based emails offer maximum last-minute copy flexibility but require manual upkeep.
✅ Global automated workflows are entirely hands-off and scale seamlessly using personalization tokens from the hapily registrant object.
✅ Event-specific workflows built via hapily Event Builder offer a hybrid approach, granting advanced automation combined with specialized event customization.
Next Steps: