
hapily promo codes let you manage discounting for your paid events without manual adjustments. Build a code once, control exactly who can use it and where, and reuse it across recurring events.
There are three ways a promo code can change the cost of registration:
- Total Purchase: discounts the entire price, including every registration in the attendee’s cart.
- Specific Registration: discounts one registration.
- Conditional Access: grants access to a different registration type when an attendee buys a specific quantity or type of registration.
This article walks through building a Total Purchase code. This approach allows you to:
- Reward sponsors, partners, or VIPs with a discount on their full purchase.
- Restrict a code to specific people, domains, lists, or companies.
- Limit how many times a code can be used, and for how long.
Create Promo Codes for Event Discounts - Watch Video
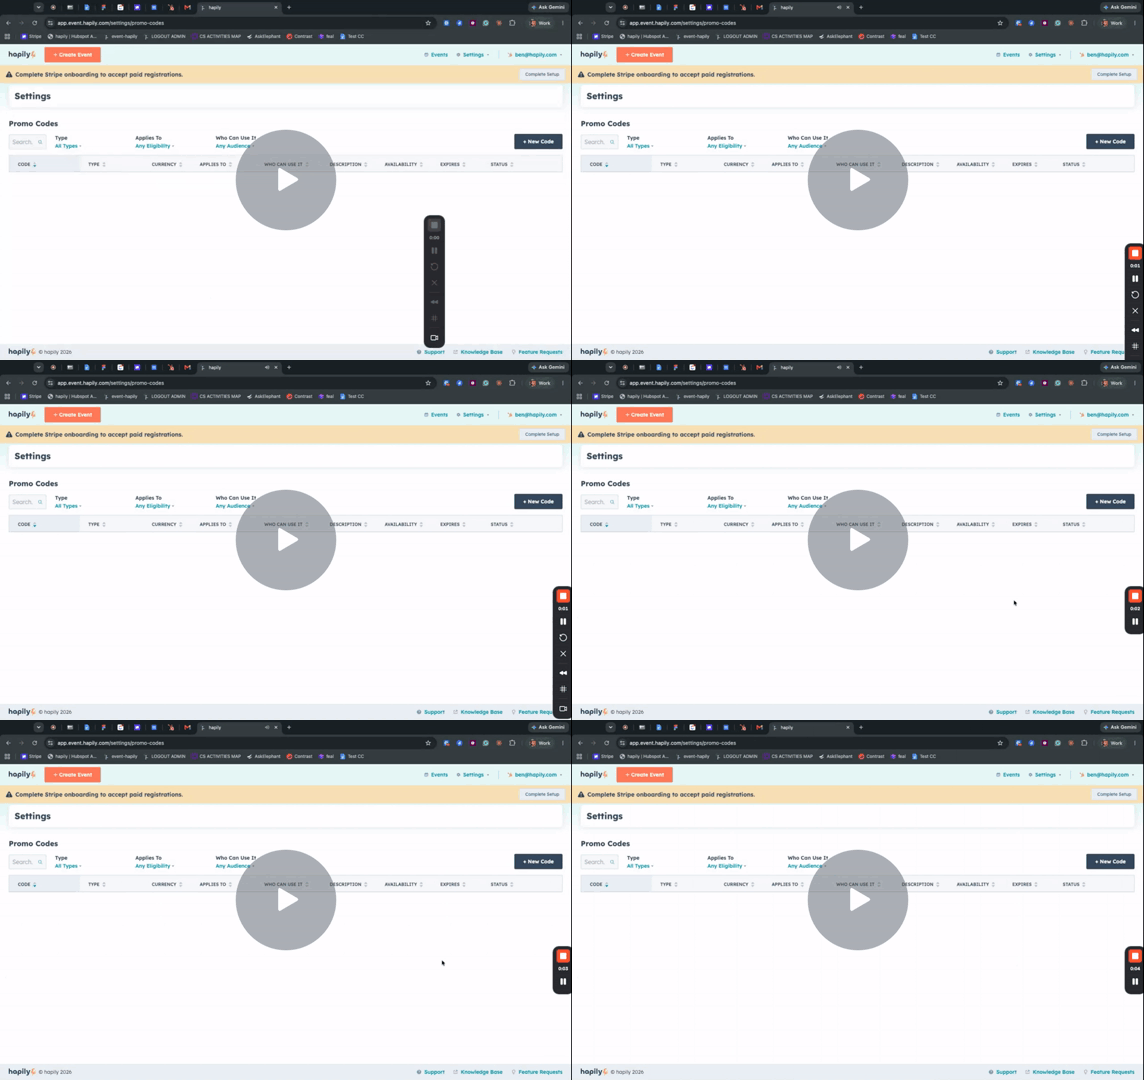
Step 1: Create a New Promo Code
- In hapily, go to Settings and open the Promo Codes section.
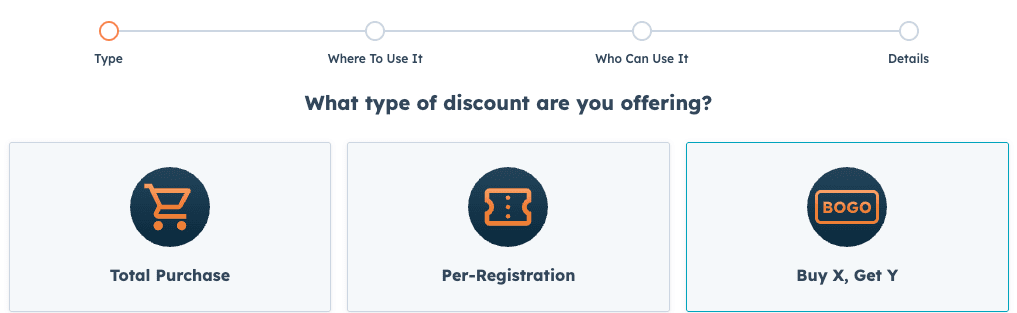
- Create a new code.
- Select Total Purchase as the discount type.
Step 2: Choose Where the Code Applies
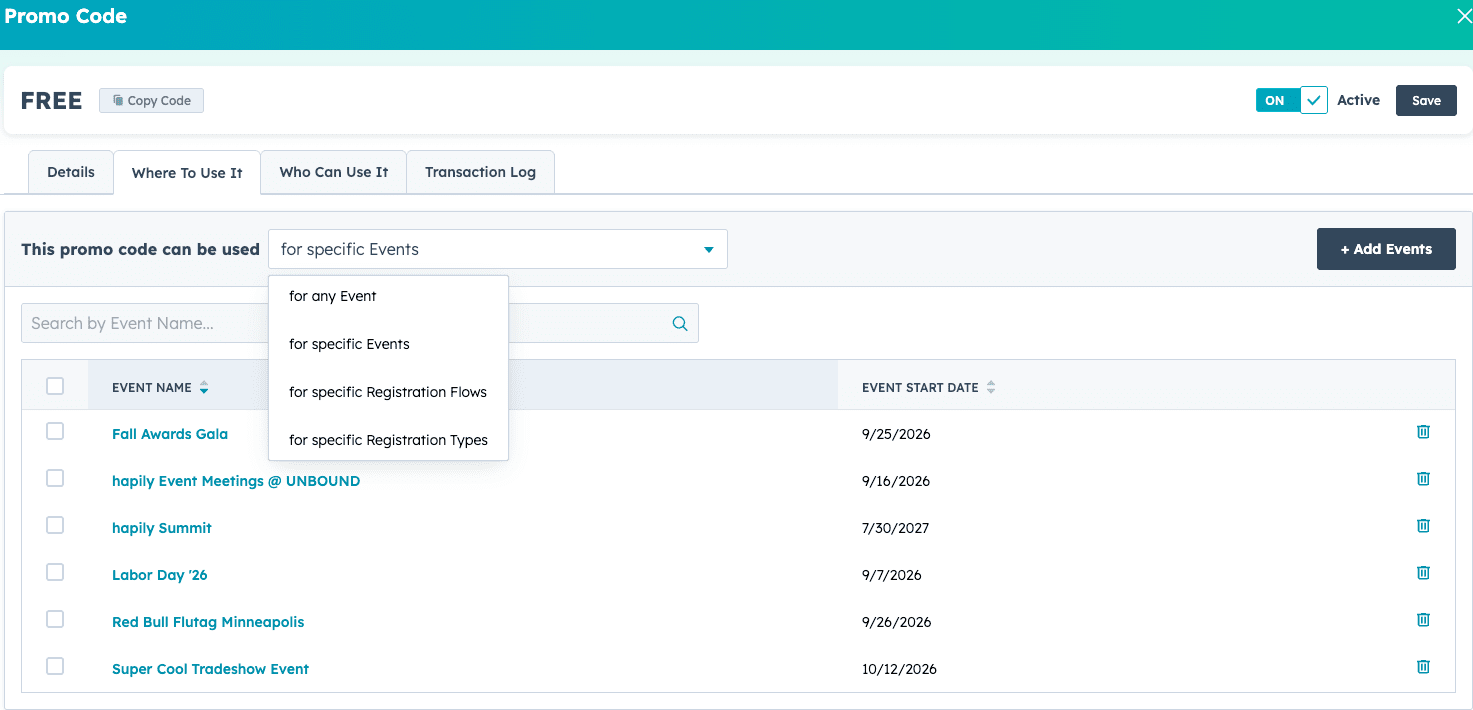
- Choose whether the code applies to one event, a set of events, or a specific type of registration.
- To reuse the code across recurring events, select All registration types and choose the registration flow. When you carry that flow over to future events, the promo code applies automatically.
- Select the registration flows the code should apply to (for example, your sponsor registration flow). hapily shows each flow alongside the event it belongs to.
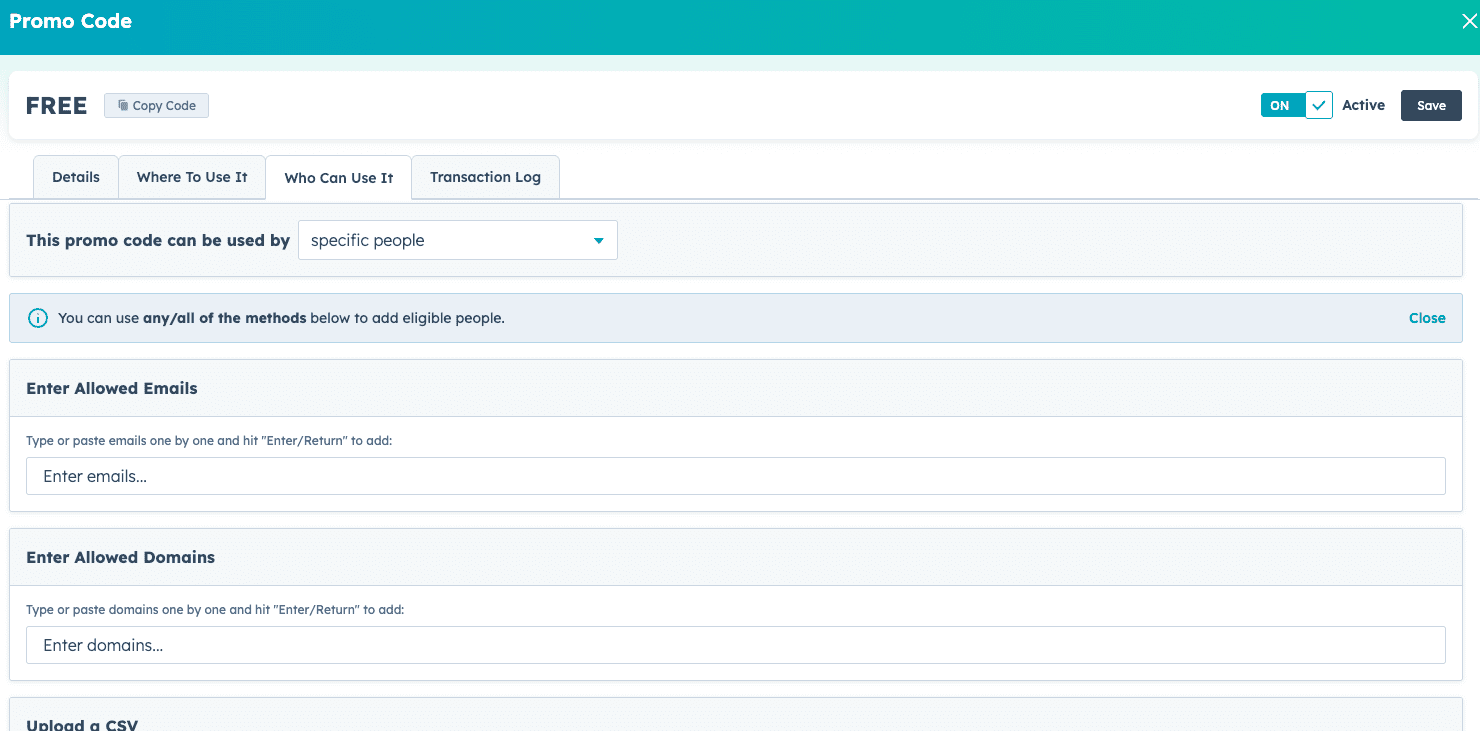
Step 3: Choose Who Can Use the Code
Select one of the following:
- Anyone with the code
- Specific people: by email address or domain, an uploaded list, or a search of a HubSpot contact list
- Specific companies: search for a company (for example, hapily) to allow anyone who works there to use the code
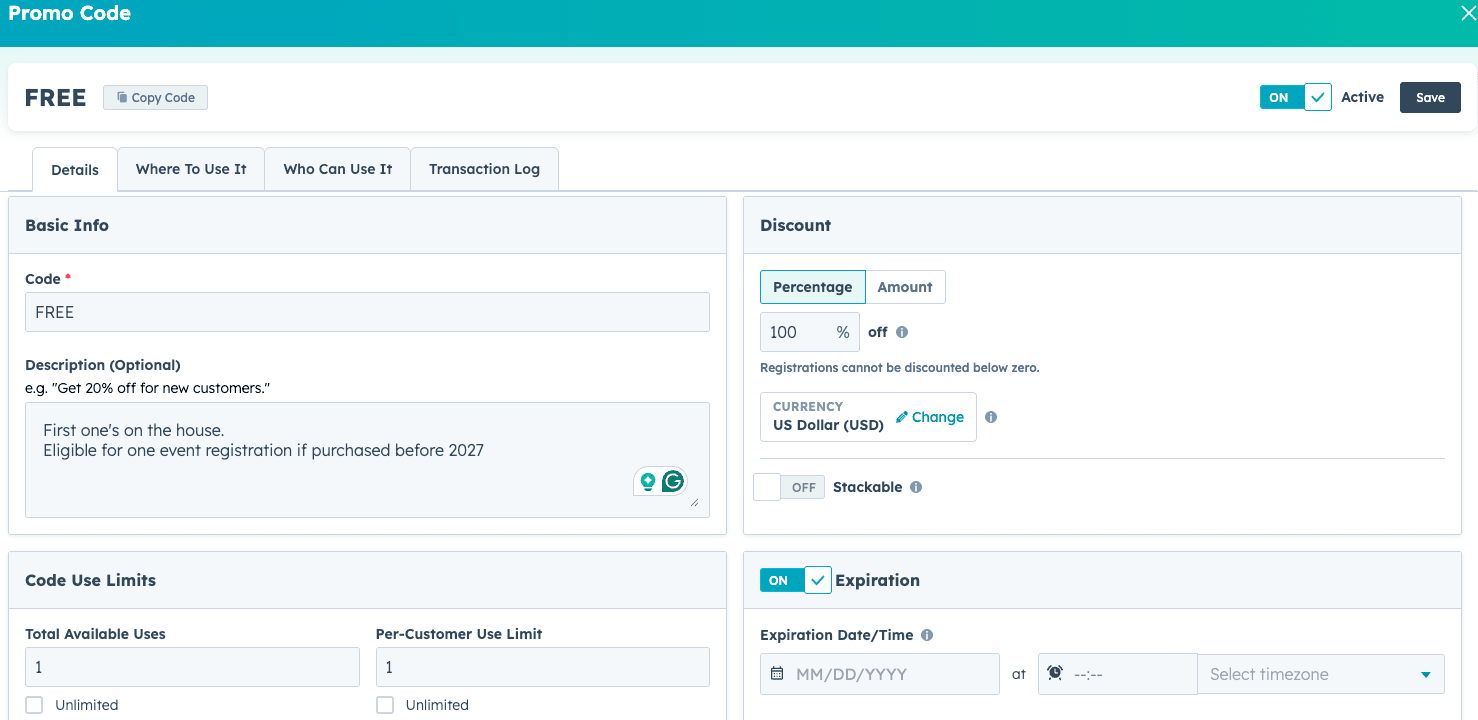
Step 4: Configure the Discount
- Name the code (for example, 20% off event registration for sponsors).
- Set the total number of uses and the uses per person.
- Choose percentage or dollar amount and enter the discount value.
- Choose whether the code can be combined with another code.
- (Optional) Set a time limit, such as valid only through the end of the year for 2027 registrations.
With a 20% Total Purchase code, 20% comes off the entire purchase regardless of which registrations are in the cart.
Step 5: Activate the Code
- After creating the code, use the toggle to turn it Active.
Step 6: Manage the Code on an Event
- Open your event record in hapily (for example, Fall Awards Gala).
- Navigate to the Registration tab and open Promo Codes.
- Confirm the code is applied to the correct registration flow.
- Click Edit to change which registration flows in this event the code is visible for.
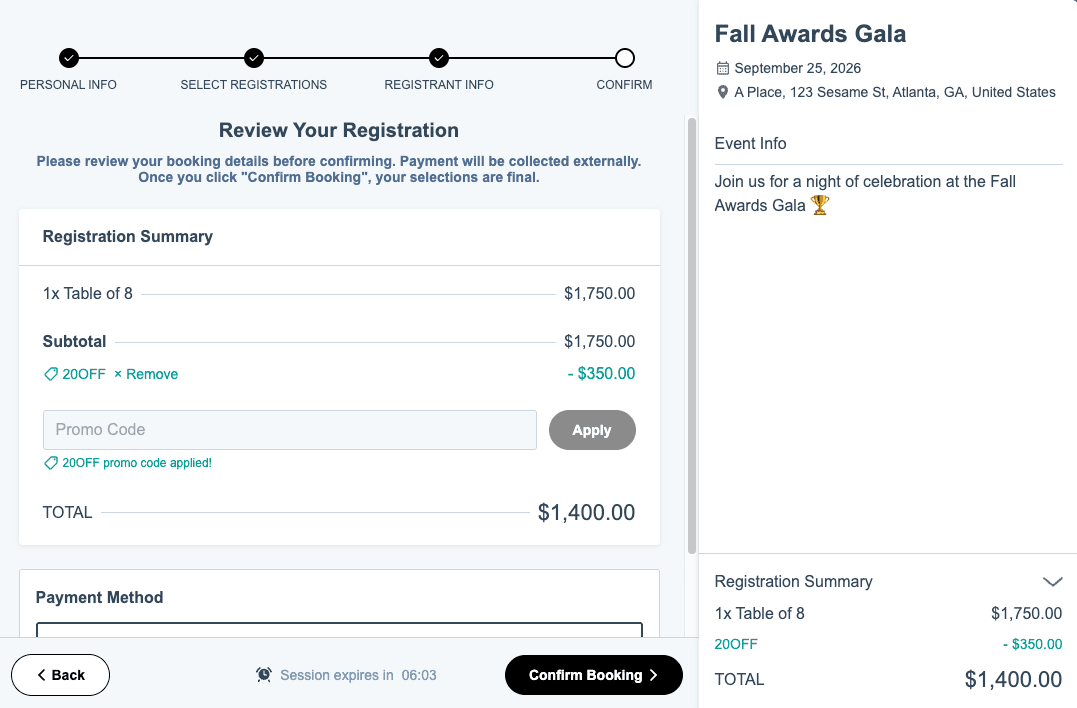
Step 7: See the Discount at Checkout
- Open the registration flow (for example, Gala Tables).
- Fill in your information and select a registration.
- On the checkout screen, enter the promo code.
- The discount is applied and displayed, and you can continue to payment.
Summary
✅ Create a code in Settings → Promo Codes and select Total Purchase.
✅ Choose the registration flows the code applies to, and reuse them across recurring events.
✅ Restrict the code by email, domain, list, HubSpot contact list, or company.
✅ Set the discount value, usage limits, stacking, and an optional end date.
✅ Toggle the code Active, then manage it from the event’s Registration → Promo Codes tab.
Next Steps: