With hapily, you can seamlessly design and render badges for your hosted events, which can be printed directly at the point of check-in. This approach allows you to:
-
Design custom badges tailored to your event's specific branding and layout requirements.
-
Choose from industry-standard badge sizes or use a custom background image.
-
Map any registrant property from HubSpot directly onto the badge layout.
-
Provide an efficient and professional check-in experience for your attendees.
🎥 Video Walkthrough:
hapily | Badge Printing Overview - Watch Video

Step 1: Create Your Event
-
Open the hapily Event Builder.
-
Set up and create your event as you normally would.
Step 2: Access the Badge Designer
-
Once your event is created, click on the event within hapily.
-
Navigate to and click on the Badges tab.
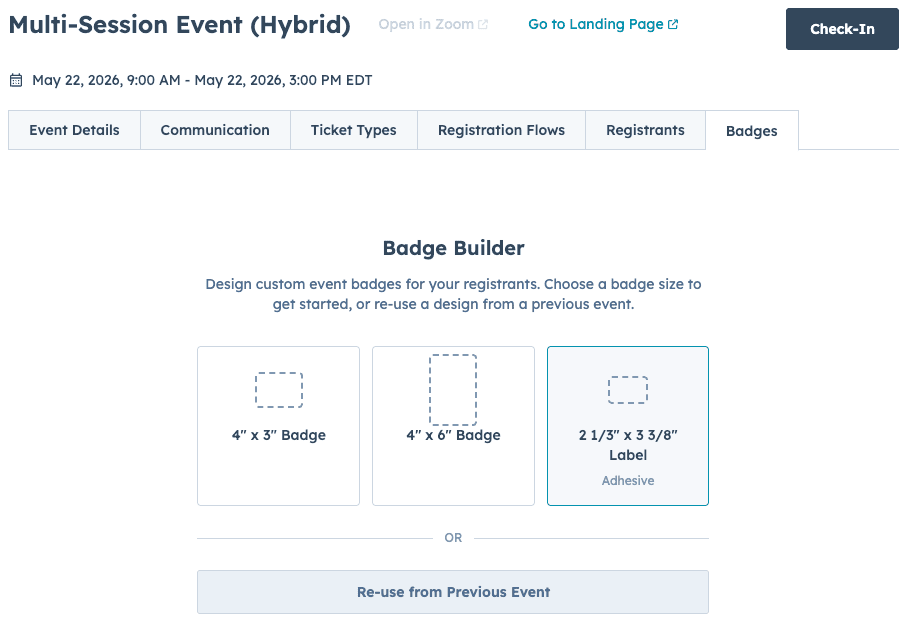
Step 3: Choose Your Badge Size and Layout
-
Select your preferred badge size template from the drop-down menu. Options include standard Avery sticker layouts (2 1/3 x 3 3/8) as well as standard Zebra/label maker sizes (4x3 or 4x6).
-
Choose your layout orientation (e.g., 4x6 vertical badge).
Step 4: Design Your Badge Customization
-
Add elements to your badge using one of the following methods:
-
Drag-and-Drop Elements: Click on data fields like Full Name or Company to automatically add them to the top center of the canvas, then drag them to your desired position.
-
Upload a Background Image: Upload a pre-designed background image containing designated sections for attendee text.
-
-
Position your text properties over the relevant visual areas of your design. The system features a snap-to-grid mechanism to assist you with center alignment.
-
If you ever need to remove a field, simply select the property and click the Delete Element button.
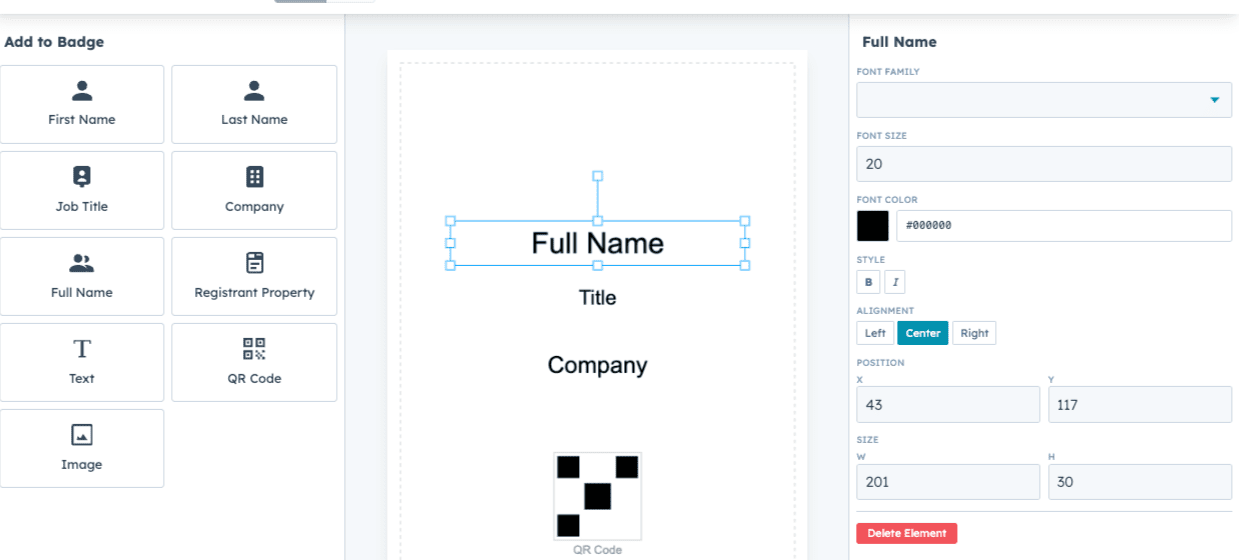
Step 5: Format Element Text and Properties
-
Select an element on the canvas to open the formatting menu on the right-hand side.
-
Adjust your formatting options, including Font Size, Color, Styling (e.g., Bold), and text alignment inside the box.
-
To add additional info, select other fields or choose any registration type property available within HubSpot. You can also include custom elements like a QR code.
Step 6: Publish the Badge Template
-
Review your design to ensure all properties map visually exactly how you want.
-
Click Publish to save and apply this badge template to every registration type for this specific event.
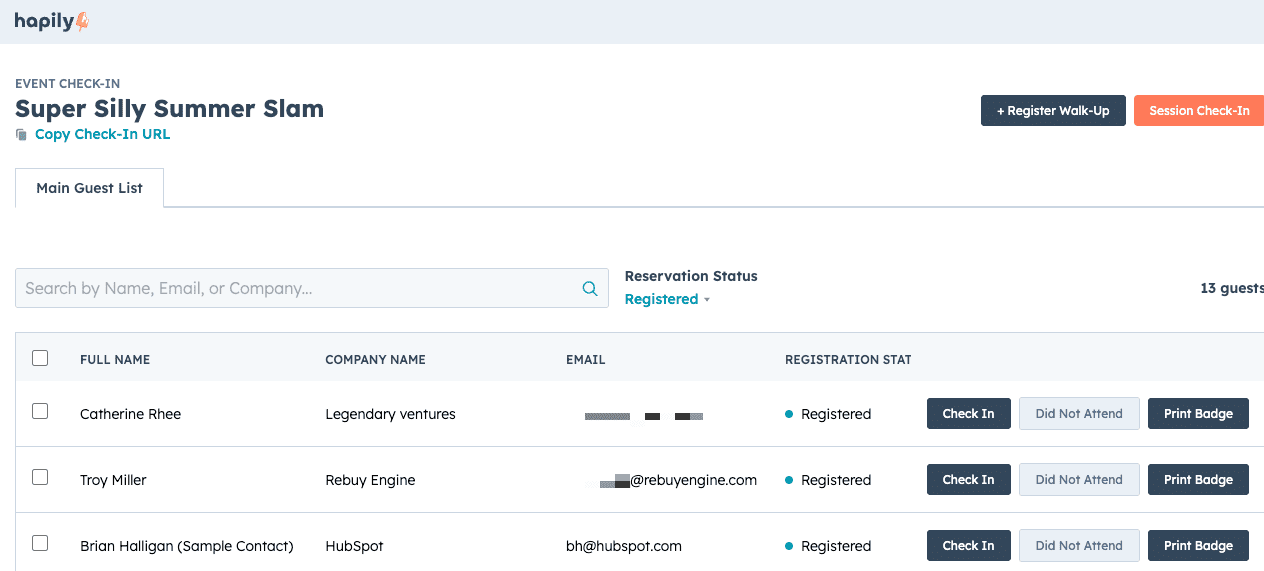
Step 7: Print Badges at Check-In
-
Navigate to the check-in page for your specific event.
-
Locate the registered attendee you wish to check in.
-
Alongside the status options, click the Print Badge button.
-
A standard print dialog will automatically open on your computer, rendering the template with the attendee’s specific information dynamically inserted into your design. Click print to complete the process.

Recap
✅ hapily allows for full badge design capabilities connected directly to your event workflows.
✅ Supports multiple dimensions like 4x3 and 4x6 sizes, compatible with major hardware providers like Zebra.
✅ Dynamically pulls and places any registration type information from your HubSpot properties.
✅ Generates native print dialogs instantly during the attendee check-in phase.
Need a badge printing partner?
Choose 2 Rent is hapily's preferred partner for badge printing equipment.
✓ Badge printers (Zebra, Datacard)
✓ Blank PVC badges
✓ Badge holders & lanyards
✓ Check-in kiosks
Learn more about Choose2Rent here.
Next Steps: